Website Chat Widget Setup Guide
Build a widget, whitelist your site, and embed it — start to finish
About This Guide
This guide walks widget owners through creating a Website Chat Widget in the Ask Sage Widget Builder and embedding it on a site. You configure everything in the platform UI — the only thing that touches your website is a copy-pasted snippet.
Prerequisites
- An Ask Sage account on your organization's instance (widget creation requires a paid account; the widget stops working if the owning account is disabled).
- Optionally, the datasets you want the widget to answer from, already ingested into Ask Sage (without one, the widget answers from the model and persona alone). See Datasets.
- The full HTTPS URLs of every site that will host the widget — you will whitelist these domains in Step 3, and the widget will not run anywhere else.
- Edit access to the hosting page (ability to paste an HTML snippet).
Step 1 — Open the Widget Builder
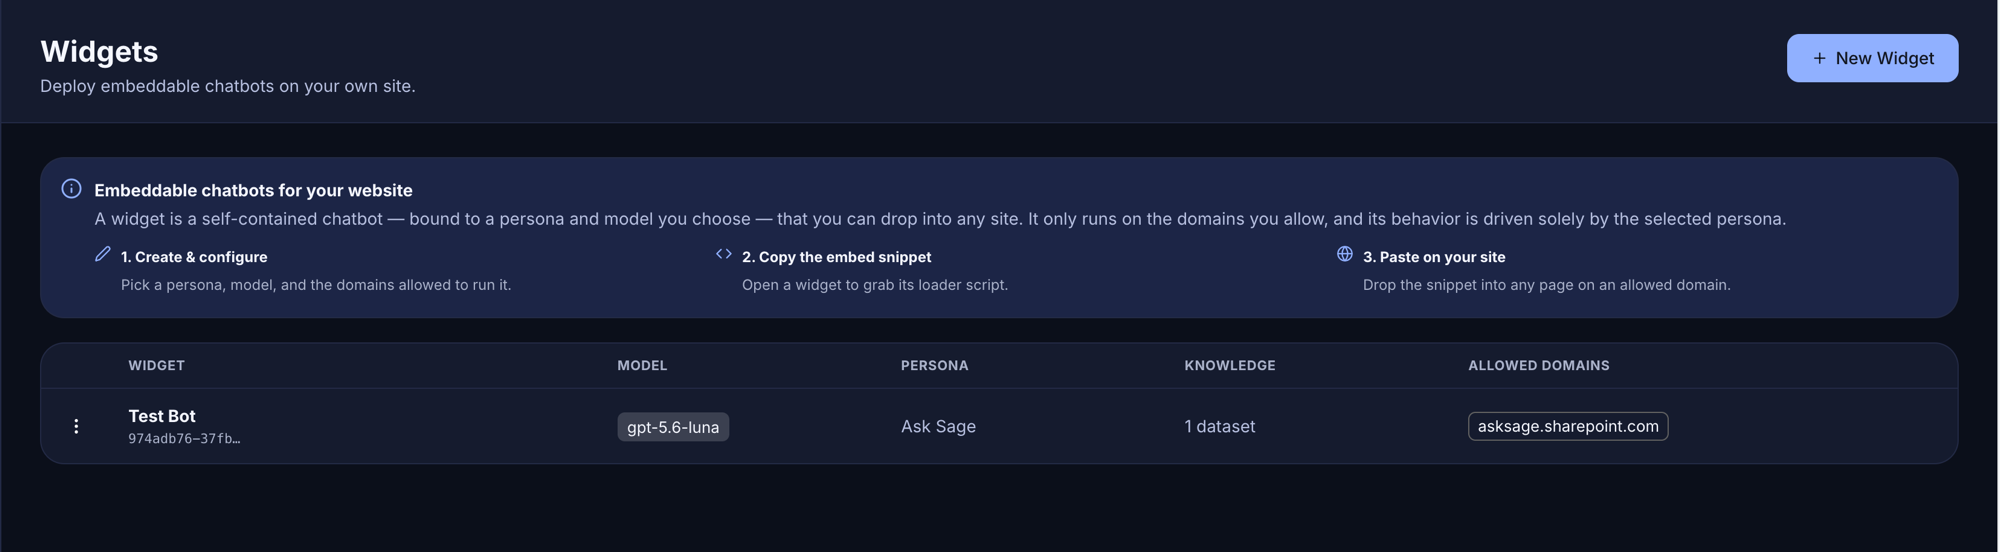
Log in to your Ask Sage instance and open Widgets from the navigation, or go directly to https://chat.asksage.ai/widgets (substitute your instance's domain). The list page shows every widget you own with its model, persona, knowledge scope, and allowed domains. Click + New Widget to start one.
Step 2 — General: name, model, persona
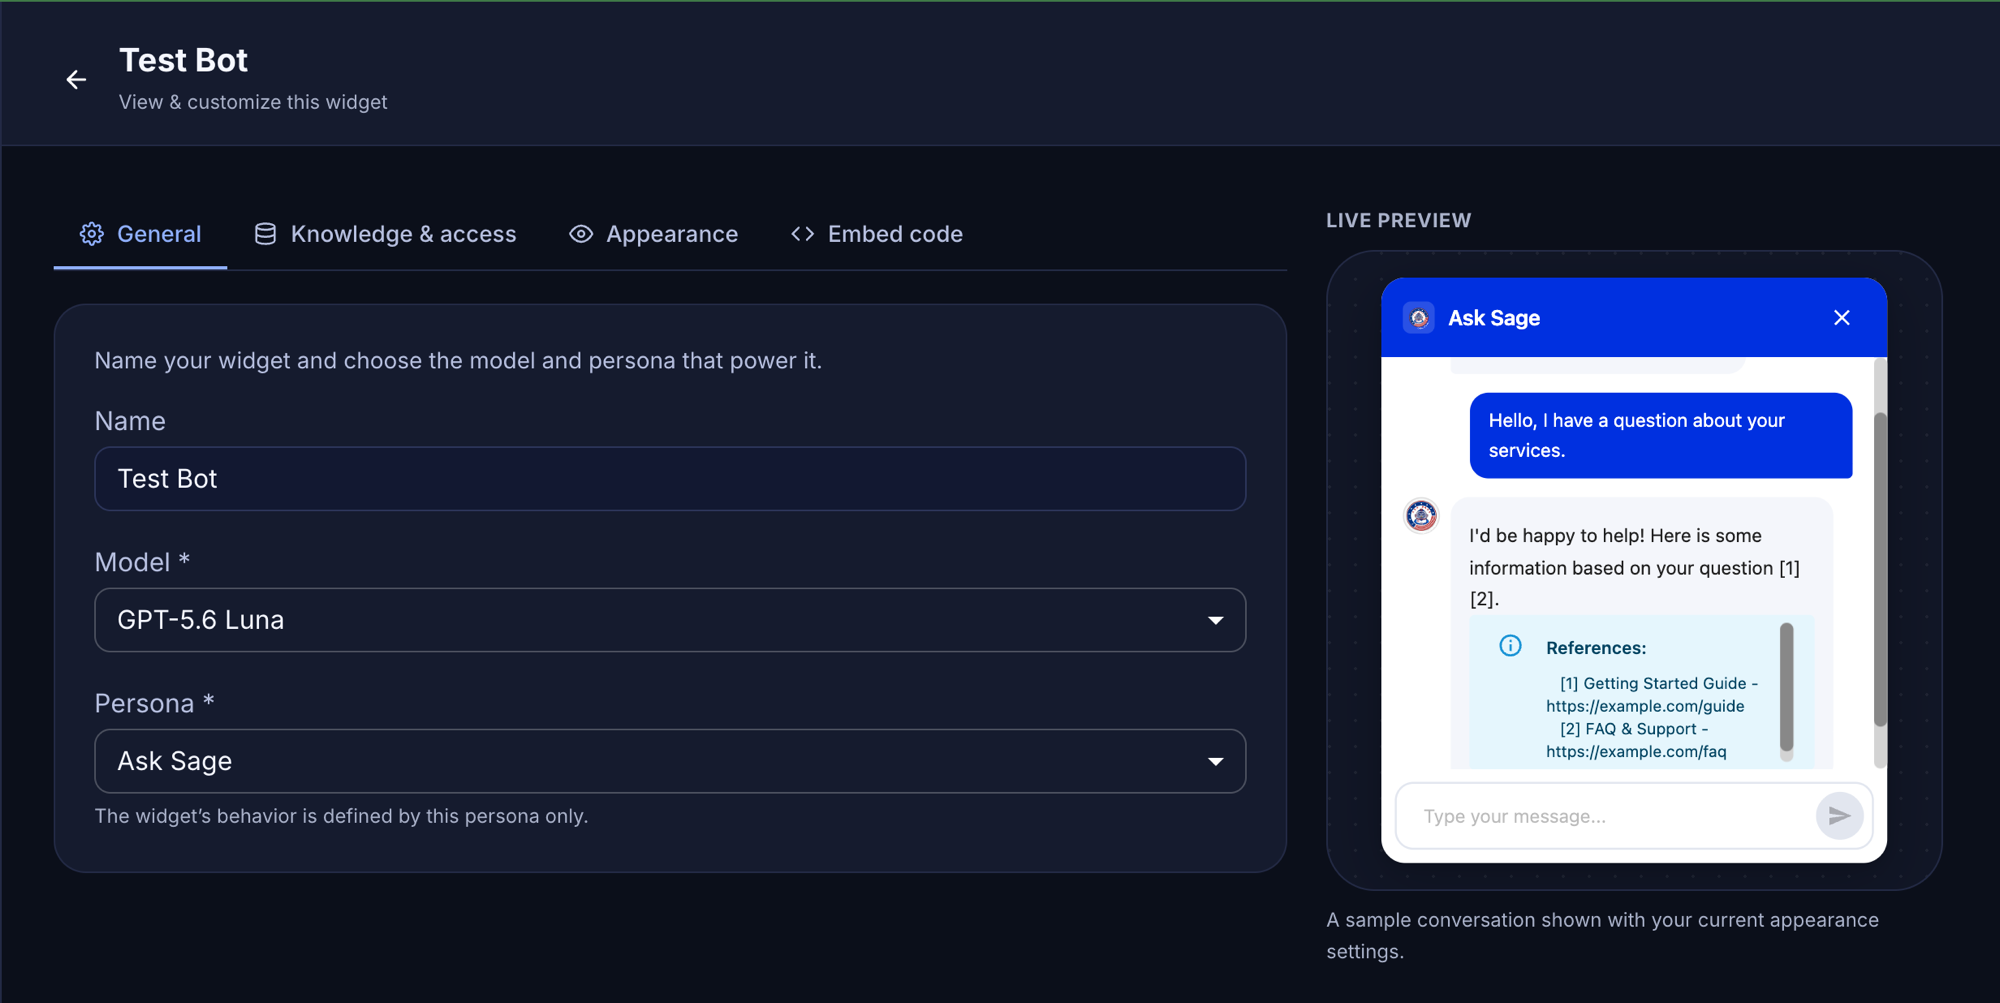
On the General tab, name your widget and choose the model and persona that power it. The live preview on the right shows a sample conversation with your current settings as you work.
- Name — internal label shown in your widget list (visitors see the Appearance header title instead).
- Model — any non-deprecated model available on your tenant. Automatic model selection ("Auto") is not available for widgets; pick a specific model.
- Persona — the widget's behavior is defined by this persona only, so choose (or create) one that fits the widget's job.
Step 3 — Knowledge & access: domains, datasets, endpoints
Whitelisted domains is the CORS whitelist — this step is mandatory. Your Ask Sage tenant validates the embedding page’s origin against this list before creating a widget session, and re-validates it on every API call the widget makes. If the hosting site’s domain is not on the list, the browser’s cross-origin request is refused and the widget will not respond (“Token is invalid”). Every site that hosts the widget must have its URL whitelisted here first.
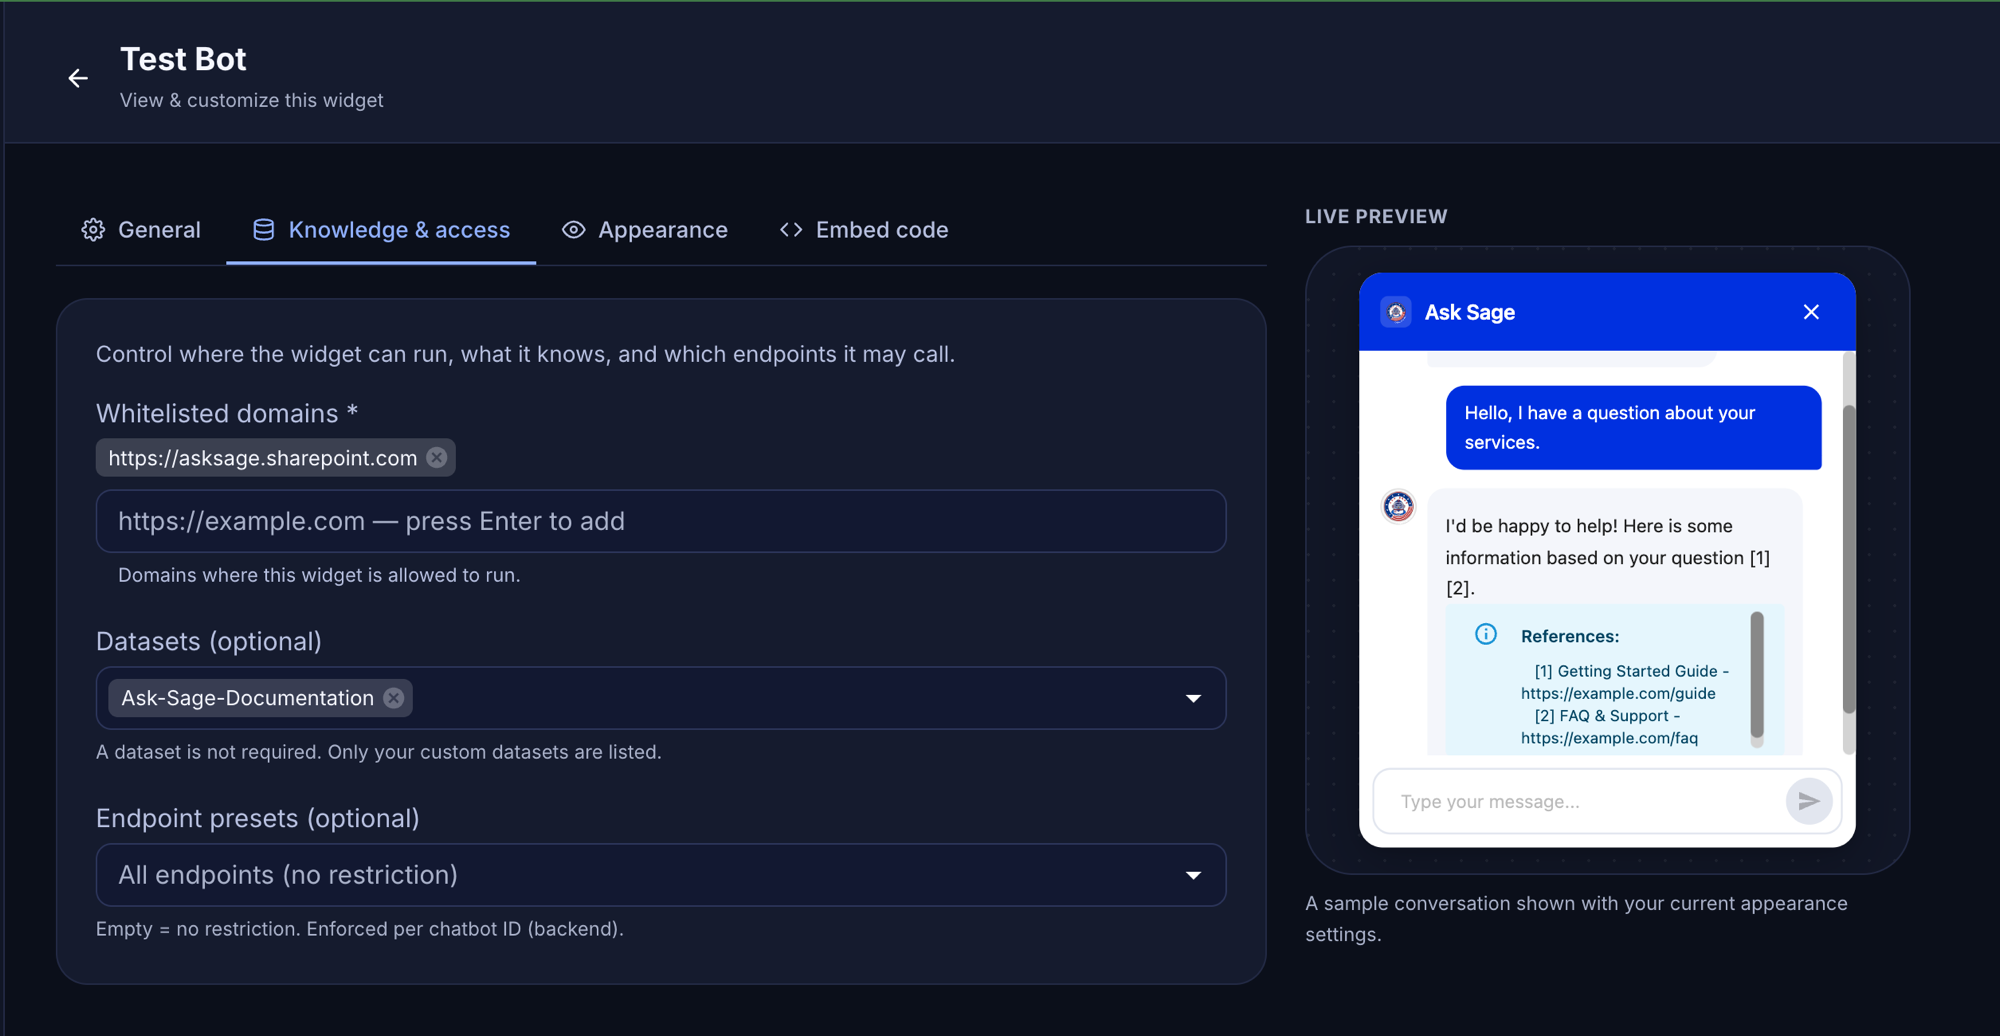
On the Knowledge & access tab, you control where the widget can run, what it knows, and which endpoints it may call:
- Whitelisted domains (required) — add every domain that will embed this widget, pressing Enter after each. Entries must be valid
https://URLs (e.g.https://portal.example.com). Matching covers subdomains: whitelistinghttps://example.comalso allows pages ondocs.example.com. At least one domain is required to save the widget. Only whitelist domains your organization controls. - Datasets (optional) — select the knowledge bases the widget may retrieve answers from; only your custom datasets are listed. The widget is scoped to exactly these datasets and cannot see anything else in your tenant. With no dataset selected, it answers from the model and persona alone.
- Endpoint presets (optional) — restrict which API capabilities the widget may call; the restriction is enforced server-side per chatbot ID. Presets include
query(chat completions),query_with_file(chat with file upload),get-models, andget-datasets. The default is All endpoints (no restriction); narrow it for least privilege.
Step 4 — Appearance: brand it
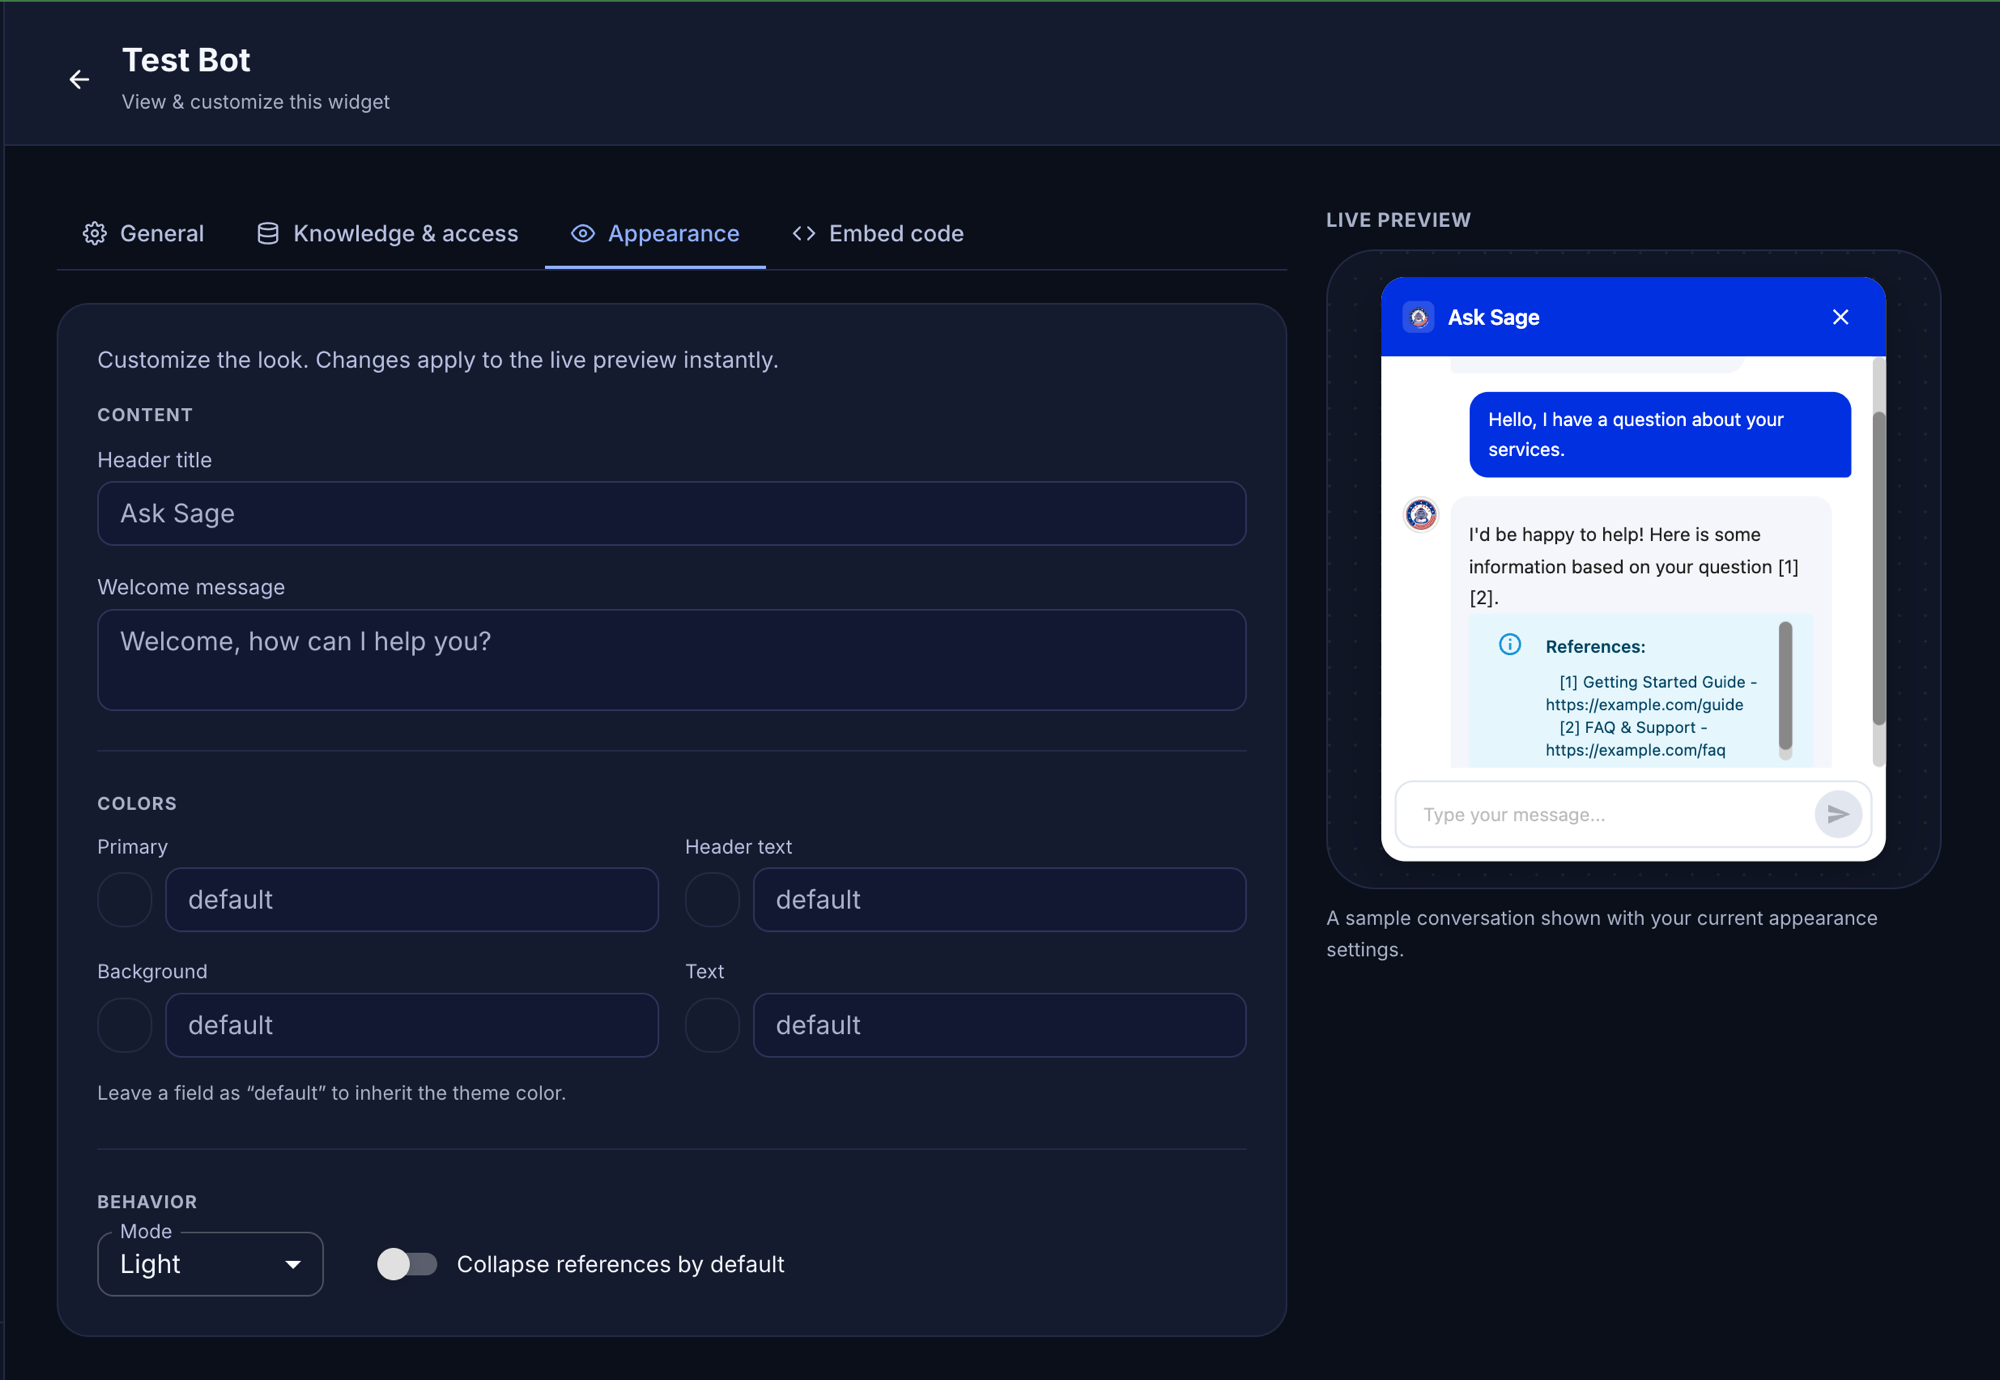
On the Appearance tab, customize the widget to match your site. Changes render instantly in the live preview.
- Header title and welcome message shown to visitors.
- Colors — primary, header text, background, and text colors as hex values (
#RGBor#RRGGBB). Leave a field as "default" to inherit the theme color. - Mode — light or dark.
- Collapse references by default — start source citations collapsed to keep answers compact.
Appearance settings are stored with the widget and delivered at load time — you can re-brand later without touching the embedded snippet.
Step 5 — Save and copy the embed snippet
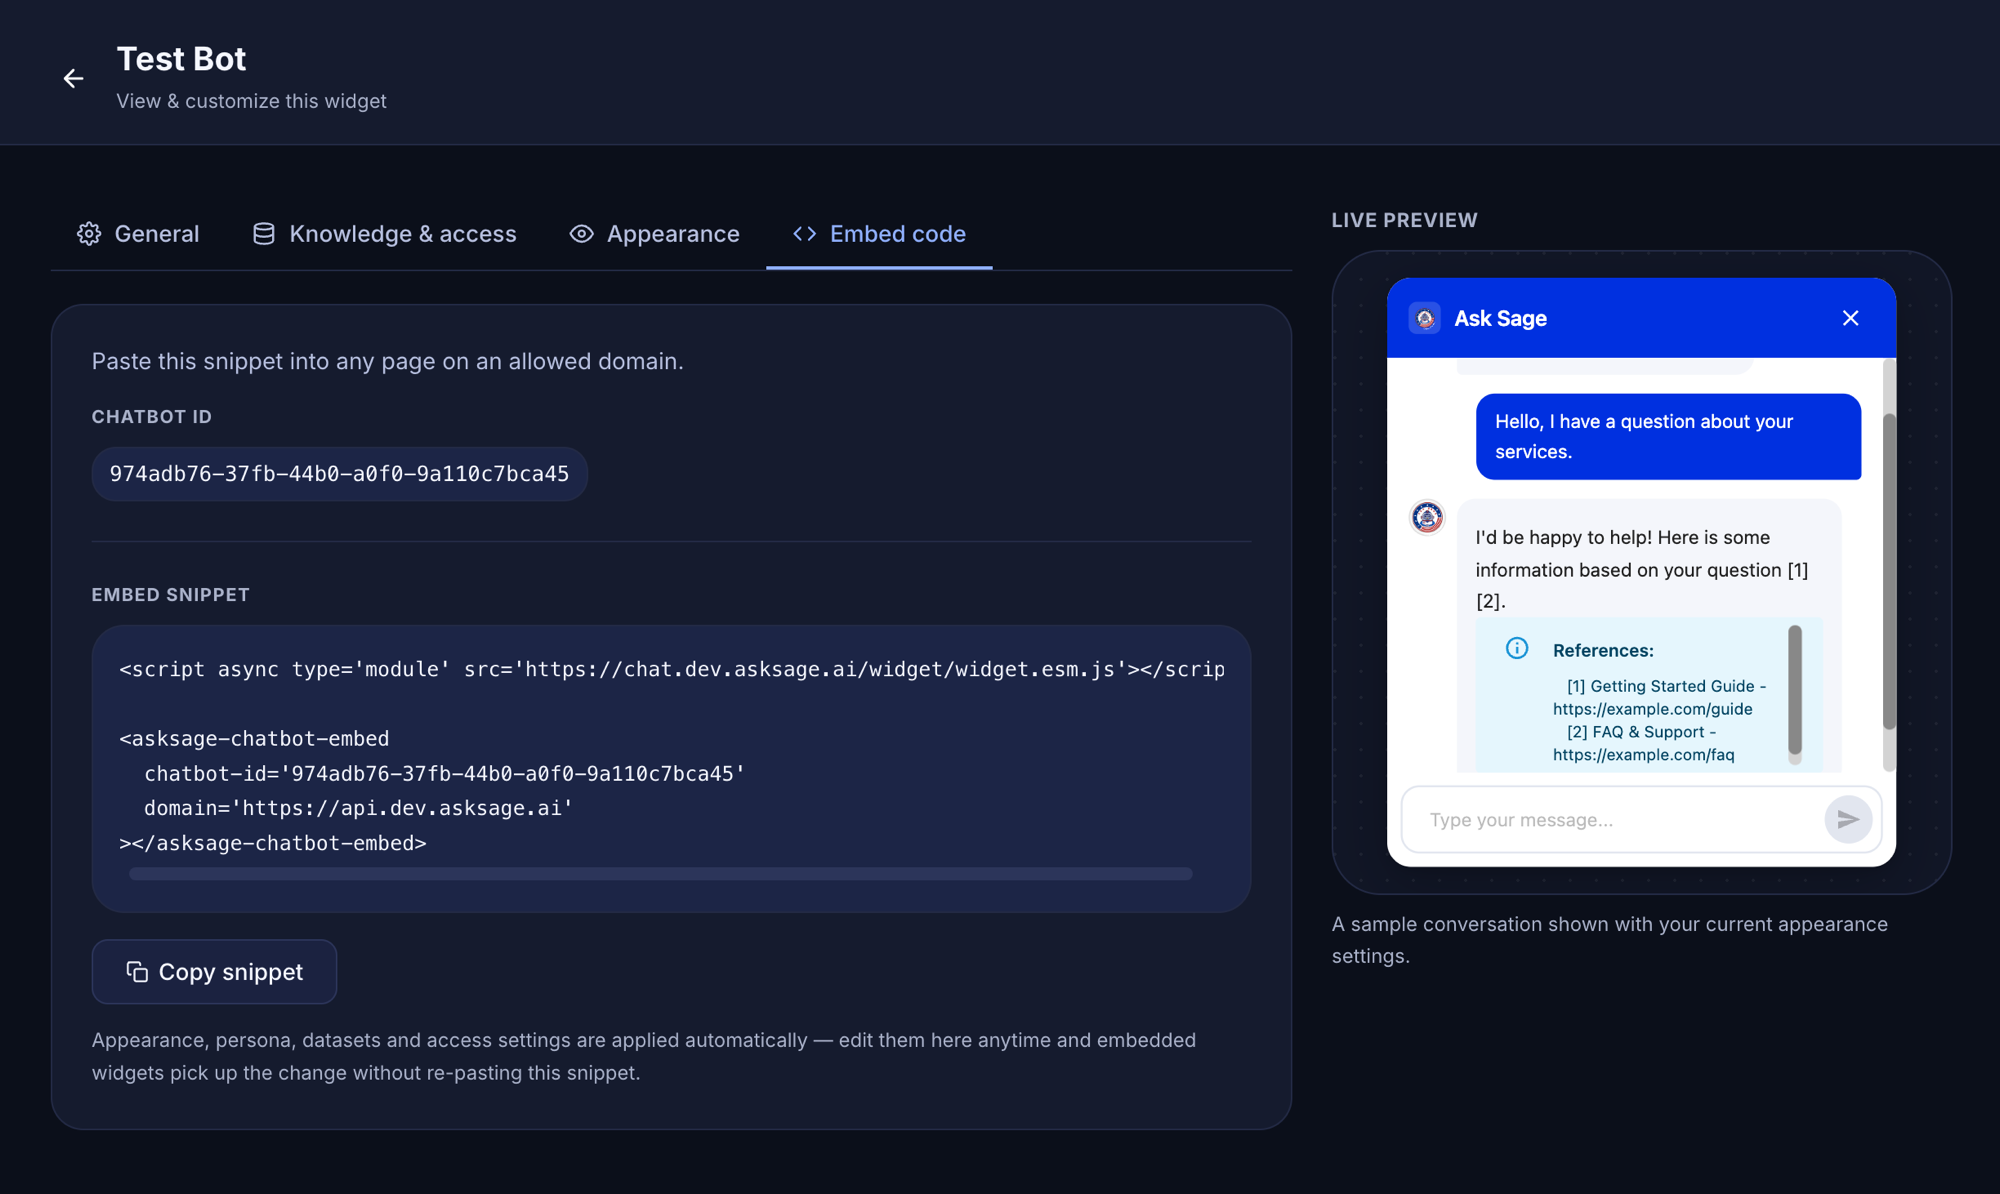
Save the widget. Saving generates its public chatbot ID (a UUID) and unlocks the Embed code tab, which contains a ready-to-copy snippet like:
<script async type='module' src='https://chat.asksage.ai/widget/widget.esm.js'></script>

<asksage-chatbot-embed
  chatbot-id='xxxxxxxx-xxxx-xxxx-xxxx-xxxxxxxxxxxx'
  domain='https://api.asksage.ai'
></asksage-chatbot-embed>
Both URLs point at your instance (the builder fills them in automatically). The snippet intentionally carries only the chatbot ID and API domain — everything else lives on the widget record, so it never goes stale.
Step 6 — Paste it into your site
Paste the snippet into the HTML of any page on a whitelisted domain — directly in the page body, via your CMS's custom-HTML block, or in a shared template to show the widget site-wide. Load the page: the chat button appears, and the widget authenticates automatically against your tenant.
That's it. Future changes to the widget's model, persona, datasets, domains, endpoints, or appearance take effect on the next page load — no snippet updates needed.
Troubleshooting
- "Token is invalid" / silent failure on load — almost always the domain whitelist. The page's origin (check the browser console for blocked cross-origin requests) must exactly match, or be a subdomain of, an entry in the widget's Whitelisted domains. Add the hosting site's
https://URL and reload. - Worked before, stopped working — confirm the owning account is still active and paid, and the widget wasn't deleted. Widgets authenticate against their owner's account on every session.
- Widget renders but answers are wrong or empty — check the datasets selected on the Knowledge & access tab; the widget can only answer from those.
- No Widgets section in the platform — widget support may be disabled on your deployment. Contact your Ask Sage administrator.
Security Notes
- The chatbot ID in the snippet is public by design — anyone who views your page source can read it. It is not a secret and grants nothing by itself.
- Protection comes from the domain whitelist (sessions are only issued to pages on approved domains, validated on load and on every call) and scoping (each session is limited to the widget's configured model, persona, datasets, and endpoints — never the owner's full account).
- Visitors never authenticate and no Ask Sage credentials or API keys ever appear in your page.
- Keep the whitelist tight: only domains your organization controls, and remove entries you no longer use.