SharePoint Admin Setup Guide
Deploy and configure the Ask Sage Chat Widget on your SharePoint sites.
About This Guide
This guide walks SharePoint site administrators and owners through the complete process of deploying and configuring the Ask Sage chatbot widget on their SharePoint sites.
Table of Contents
- Prerequisites
- Step 1: Upload to App Catalog
- Step 2: Add Web Part to a Page
- Step 3: Configure API Connection
- Step 4: Configure Dataset Access
- Step 5: Configure Access Control (Optional)
- Step 6: Publish and Test
- Troubleshooting
- Security Considerations
- Monitoring Recommendations
- Setup Checklist
- Additional Resources
Prerequisites
Ensure you have the following before starting:
Step 1: Upload to App Catalog
1.1 Navigate to App Catalog
Go to your SharePoint Admin Center
Navigate to More features > Apps > Open
Click App Catalog. If you don't have one, you'll need to create an App Catalog first.
1.2 Upload the Package
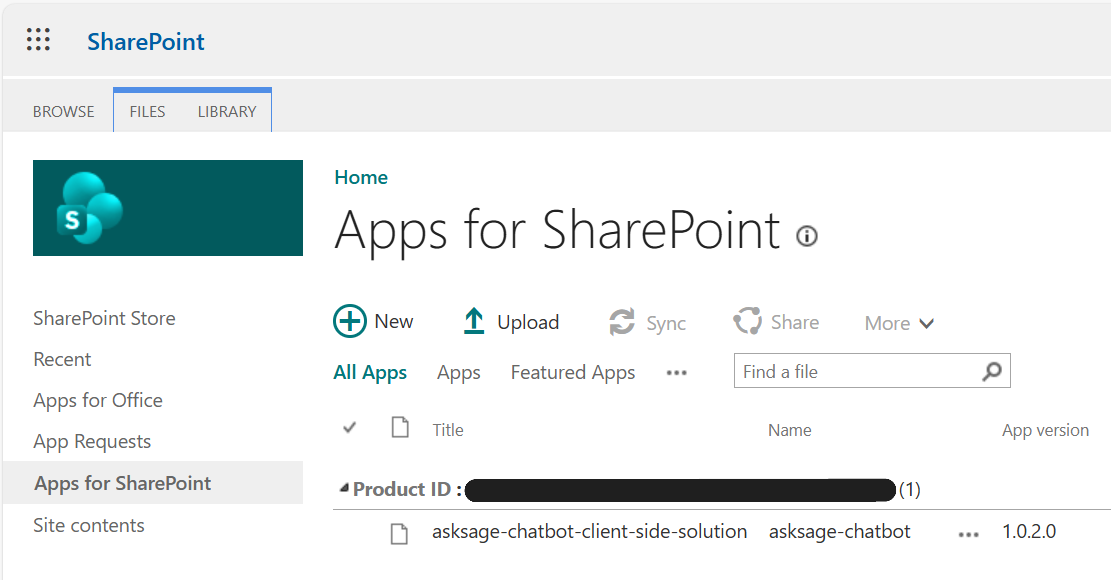
In the App Catalog, go to Apps for SharePoint
Click Upload or drag and drop the asksage-chatbot.sppkg file
A dialog will appear asking you to deploy the solution
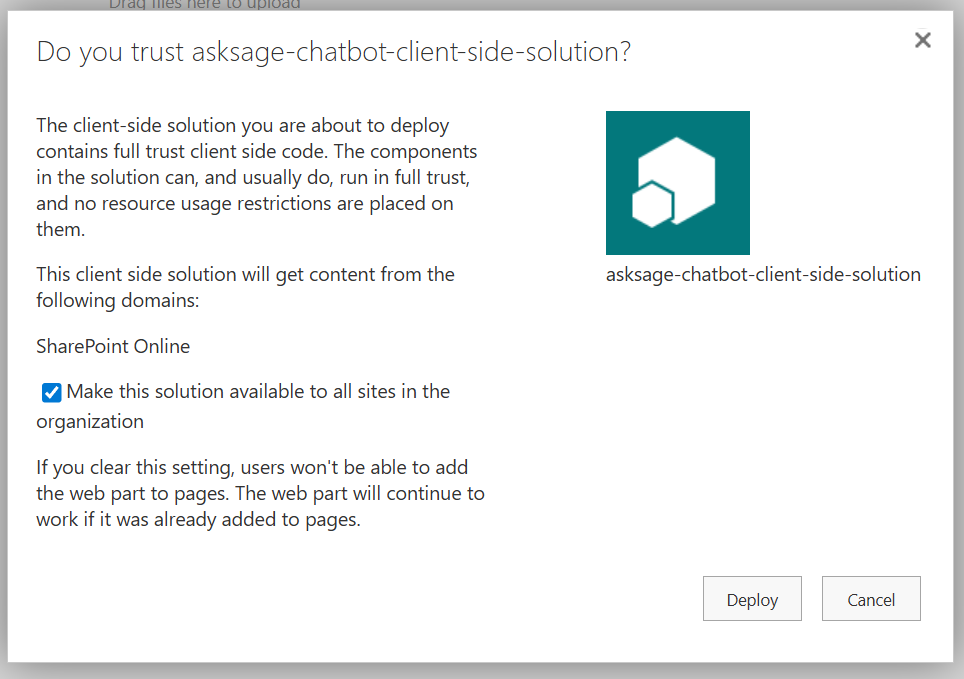
1.3 Deploy the Solution
Check the box: "Make this solution available to all sites in the organization". This allows the web part to be used on any site. You can control access later using the built-in whitelist feature.
Click Deploy and wait for deployment to complete (usually 1-2 minutes)
Step 2: Add Web Part to a Page
Go to the SharePoint site and page where you want to add the chatbot
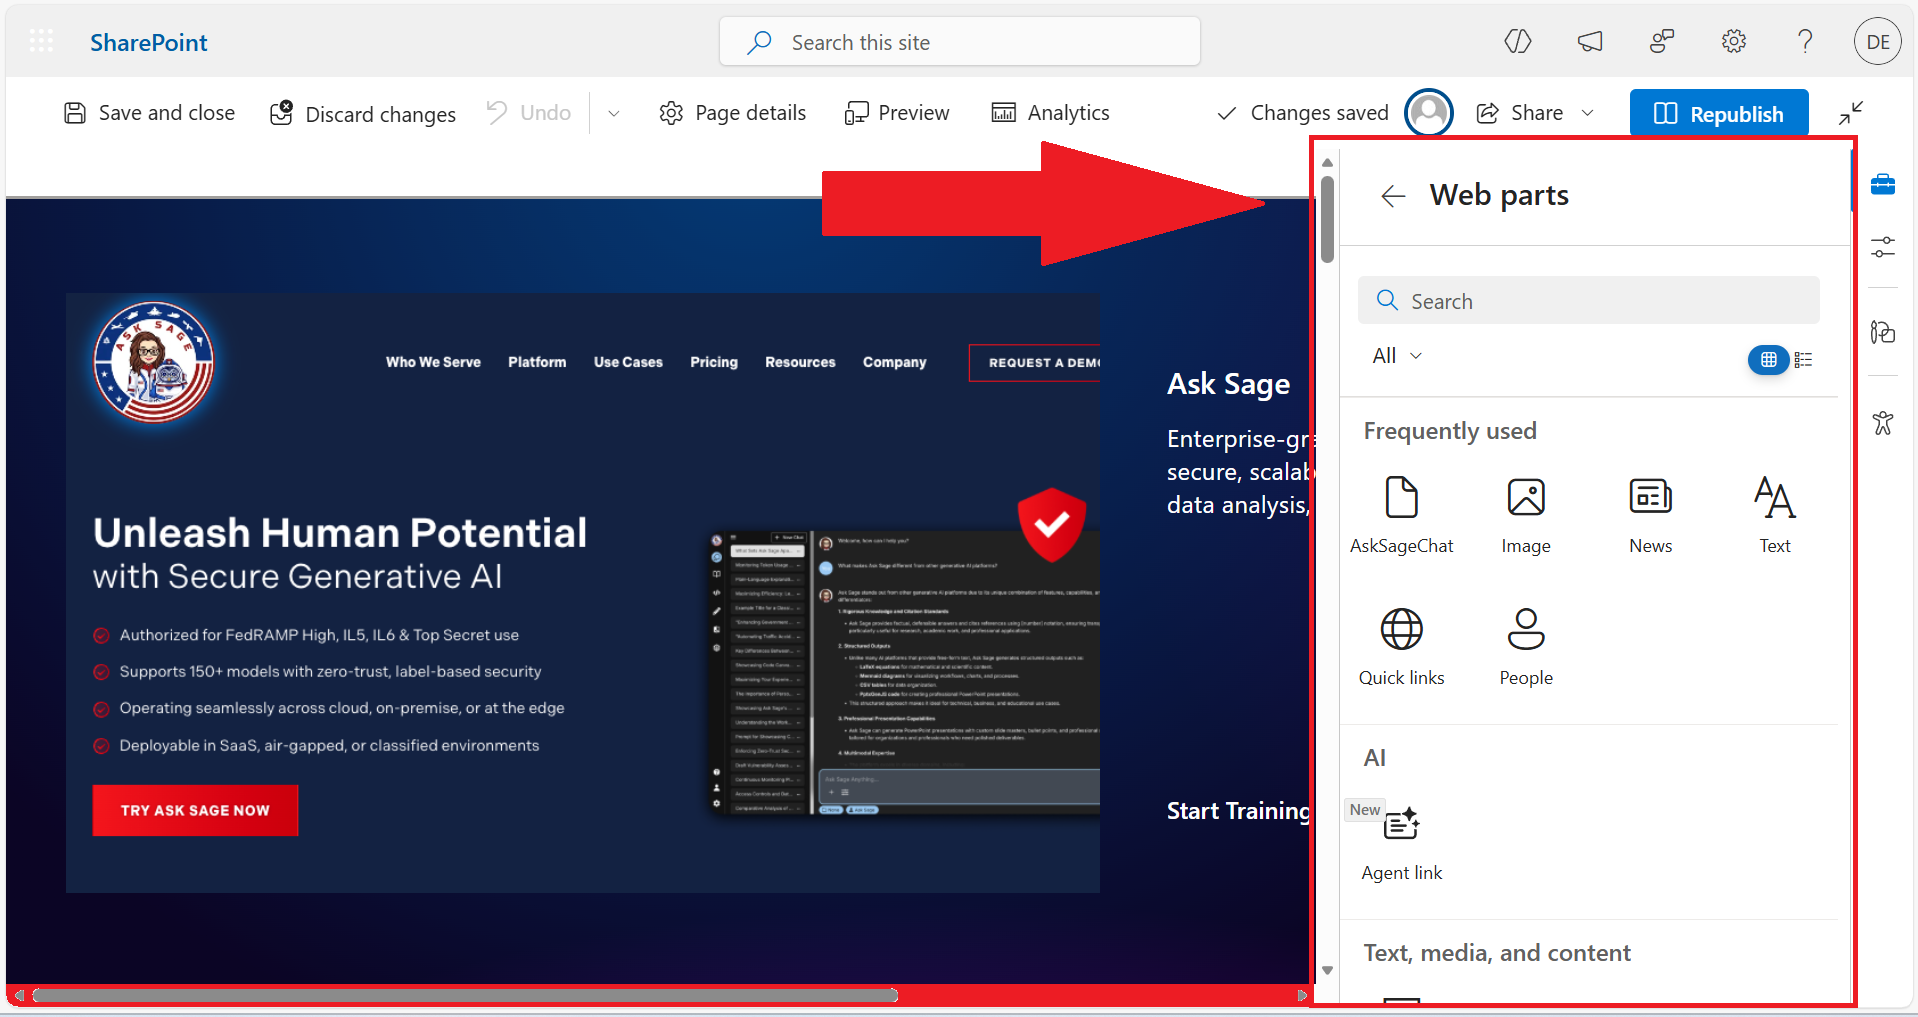
Click Edit in the top-right corner of the page
Click See all web parts and search for "Ask Sage" or "AskSageChat"
Click on the Ask Sage Chat web part to add it to the page. It will appear as a blue icon in the bottom right corner with "Initialize Chat" displayed.
Step 3: Configure API Connection
3.1 Open the Property Pane
Click the Properties button on the right side after selecting the web part. The property pane will open on the right side of the screen.
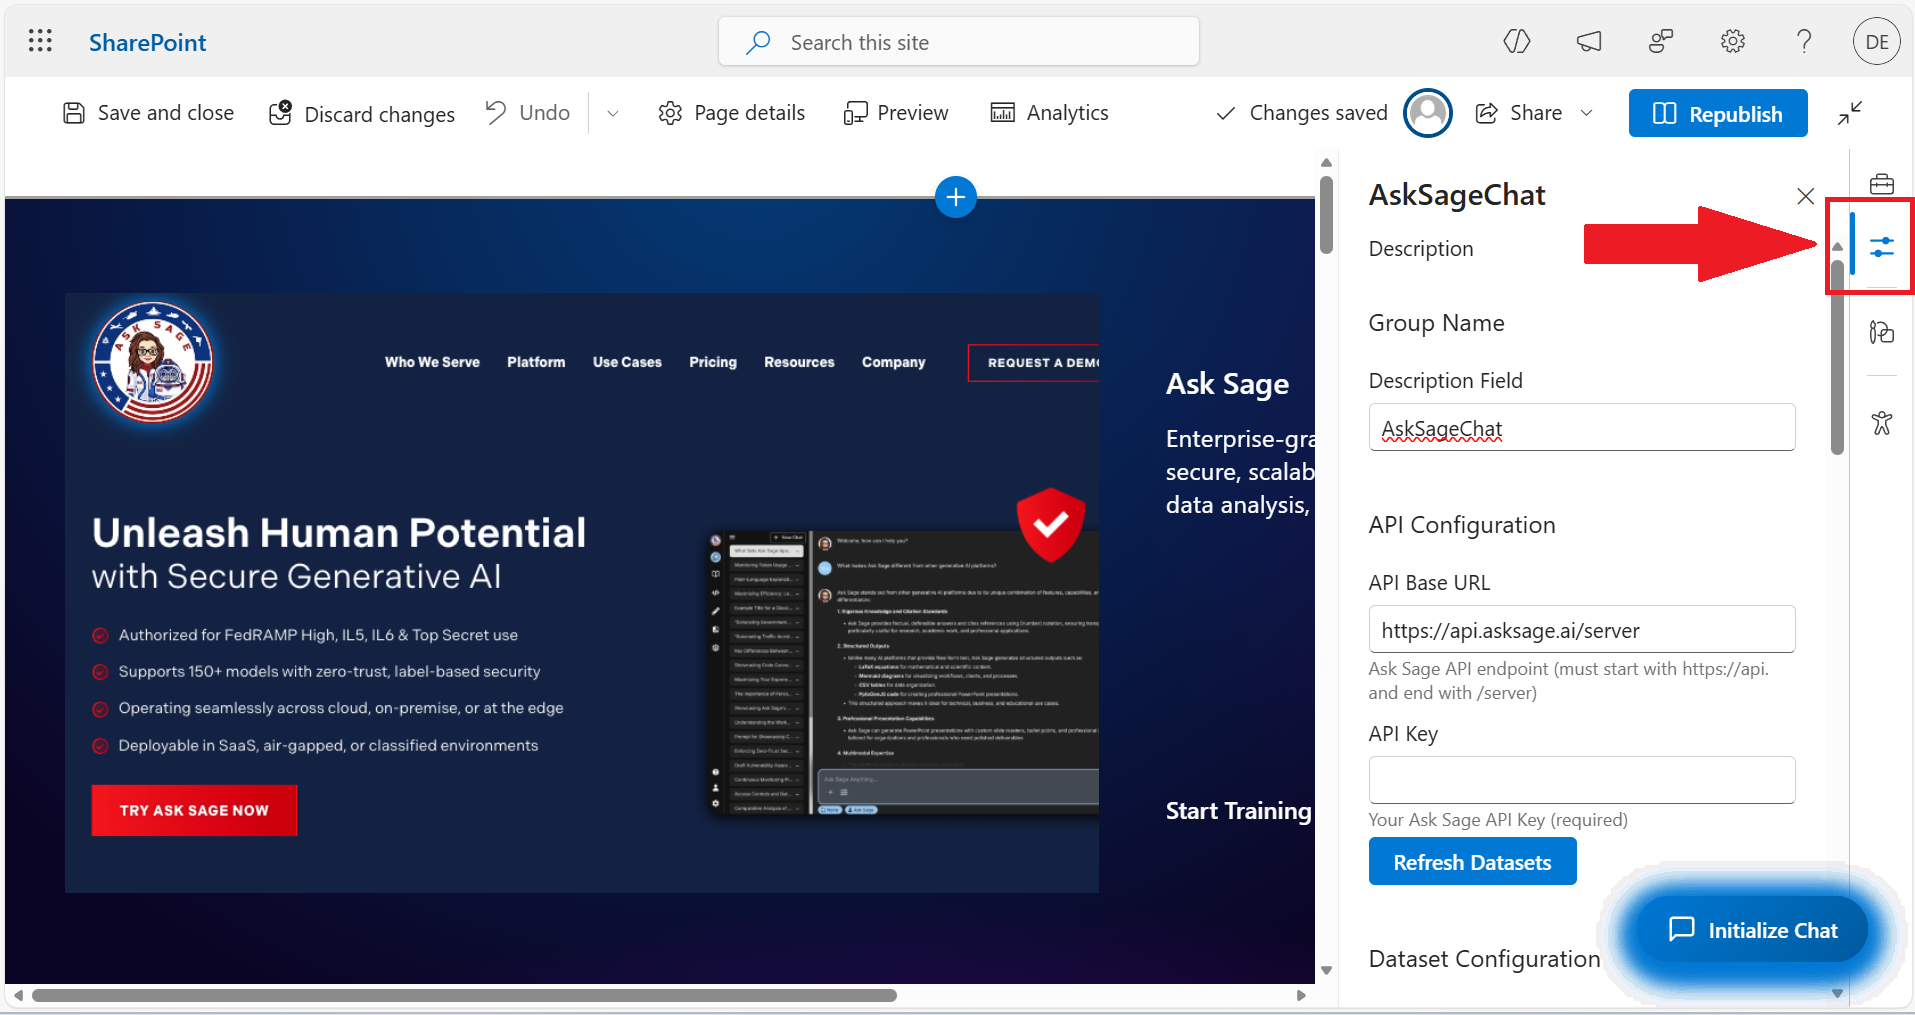
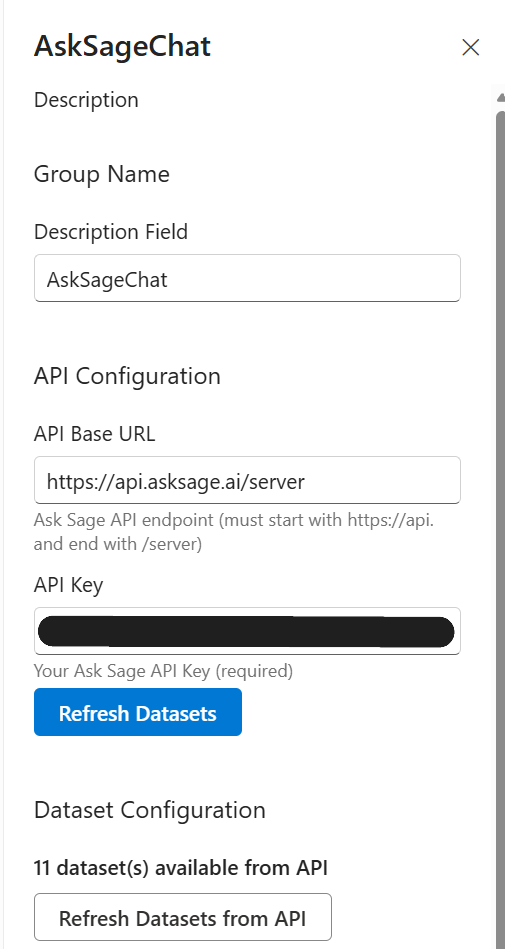
3.2 Configure API Settings
| Setting | What to Enter | Required |
|---|---|---|
| API Key | Your organization's Ask Sage API key | Yes |
| API Base URL | Default: https://api.asksage.ai/server. Change only if using a proxy. | No |
Enter your API Key in the provided field
(Optional) Change the API Base URL if using a custom proxy or different endpoint
Click the "Refresh Datasets" button to load your available knowledge bases
api.asksage.ai. Step 4: Configure Dataset Access
Datasets are the knowledge bases that the chatbot can search. You can control which datasets users can access and which are selected by default.
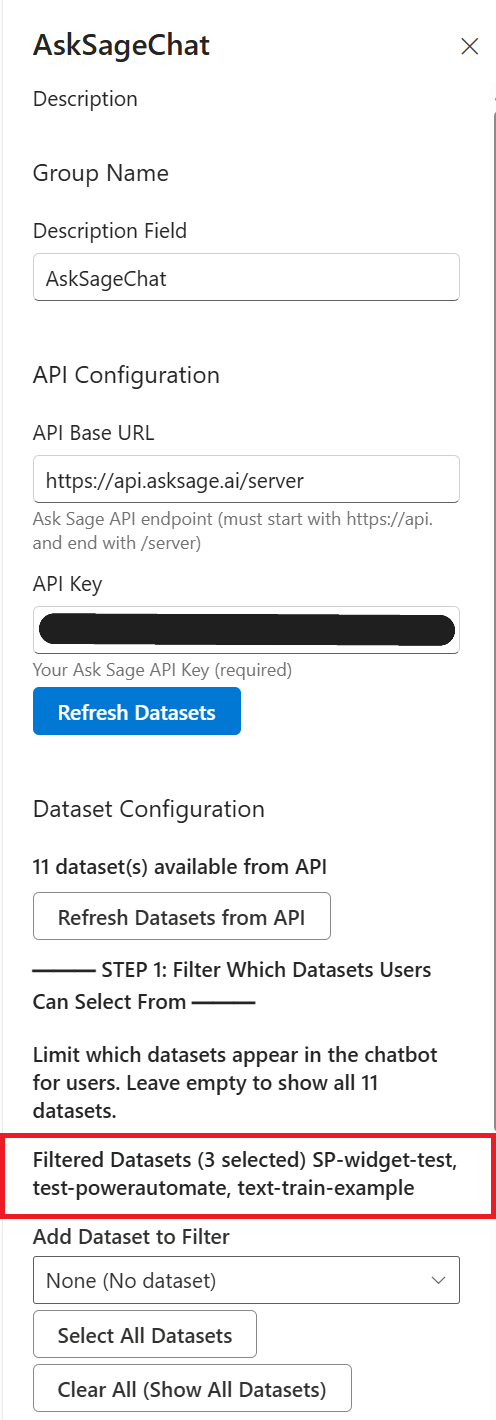
4.1 Filter Available Datasets (Optional)
Purpose: Limit which datasets users can choose from in the chatbot interface.
In the "Dataset Configuration" section, find "STEP 1: Filter which datasets users can select"
Choose one of the following:
- Leave empty -- Users can see and select from all datasets
- Select specific datasets -- Use the dropdown to choose which datasets should be available
Use "Select All" to add all datasets or "Clear All" to remove all selections
4.2 Set Default Datasets
Purpose: Pre-select which datasets are active when users first open the chatbot.
Find "STEP 2: Set default pre-selected datasets" in the same section
Use the dropdown to select dataset(s). You can only select from datasets in the filtered list (if you configured one).
Use "Copy from Filtered Datasets" to quickly set all filtered datasets as defaults, or "Clear All" to remove defaults.
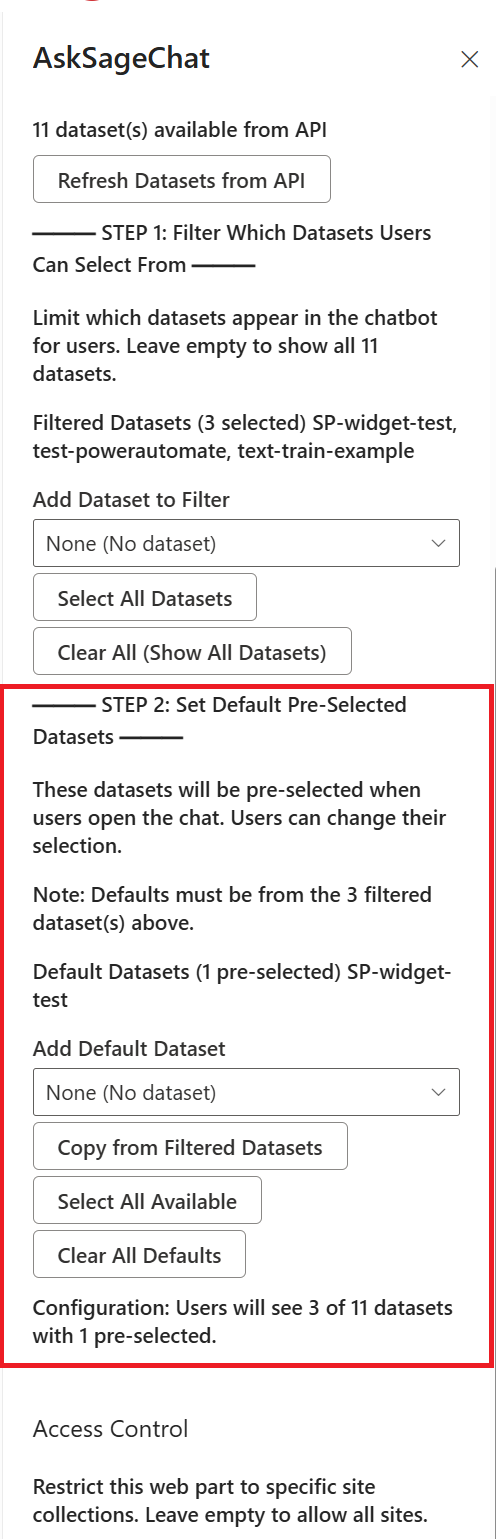
- Filtered Datasets:
sales-docs, product-catalog, pricing-guide - Default Datasets:
sales-docs, product-catalog - Result: Users see three datasets but two are already selected when they open the chat
Step 5: Configure Access Control (Optional)
The Site Collection Whitelist restricts which SharePoint sites can use this web part instance.
Understanding the Whitelist
- Empty whitelist = Web part works on all sites (default)
- Populated whitelist = Web part only works on matching sites
- Supports wildcard patterns (
*) for flexible matching
Add Site Restrictions
Expand the "Access Control" section in the property pane and enter URL patterns in the "Site Collection Whitelist" field (one per line):
# Allow all sites on your tenant
*.contoso.com

# Allow only HR and IT sites
https://contoso.sharepoint.com/sites/HR/*
https://contoso.sharepoint.com/sites/IT/*

# Allow a specific page
https://contoso.sharepoint.com/sites/Intranet/SitePages/Home.aspx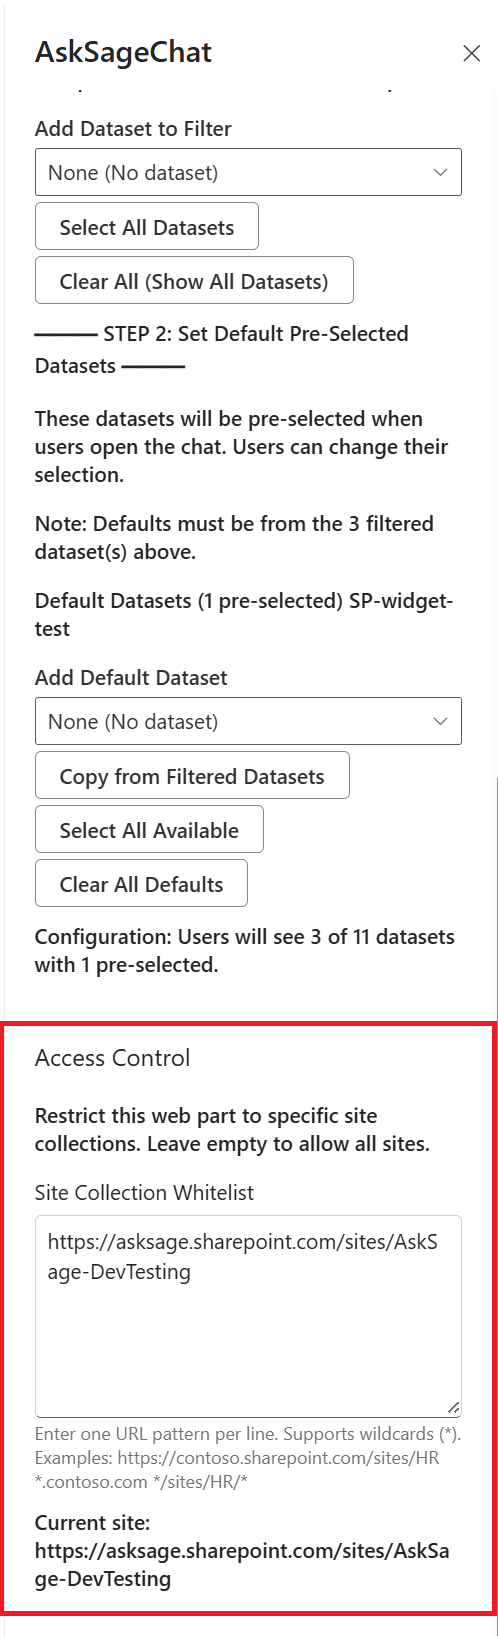
Pattern Matching Rules
| Pattern | Matches |
|---|---|
https://contoso.sharepoint.com/sites/HR | Only this exact site |
*.sharepoint.com/sites/IT | Any subdomain with this path |
https://contoso.sharepoint.com/* | Any path under this domain |
*/sites/Sales/* | Any domain with /sites/Sales/ in the path |
Lines starting with # are treated as comments.
Step 6: Publish and Test
6.1 Save and Publish
Review all your settings in the property pane, then close it (settings are saved automatically)
Click "Republish" or "Publish" in the top-right corner to make the chatbot live
6.2 Test the Chatbot
View the published page and verify the following:
- The chatbot widget appears and shows "Connected" status (no "Connecting..." message)
- Click to open the chat interface
- Verify the correct datasets are pre-selected
- Send a test question and receive a response
- Try selecting different datasets (if multiple are available)
- Verify the chat history persists during your session
Troubleshooting
Solutions:
- Verify the API key in the property pane is correct
- Check that your firewall/proxy allows access to
api.asksage.ai - Open browser Developer Tools (F12) and check the Console tab for errors
- Contact Ask Sage support if the issue persists
Solutions:
- Ensure you've entered the API key in the property pane
- Click "Refresh Datasets" after entering the key
- Verify your Ask Sage account has datasets configured
- Check browser console for error messages
Solutions:
- Edit the page and open the web part property pane
- Go to "Access Control" section
- Add the current site URL to the whitelist, or clear the whitelist entirely
- Republish the page
Solutions:
- Wait 60 seconds for the rate limit to reset
- The message will automatically clear when the rate limit resets
- This is a normal protection mechanism to prevent abuse
Solutions:
- Ensure at least one dataset is selected in the chat interface
- Try selecting different datasets
- Verify the datasets contain content in your Ask Sage admin panel
- Check browser console for error messages
Security Considerations
API Key Protection
Mitigation Steps:
- Restrict page editing permissions to trusted administrators only
- Monitor API usage regularly through your Ask Sage dashboard
- Rotate API keys periodically (quarterly recommended)
- Set up usage alerts in your Ask Sage account
Rate Limiting
The current client-side rate limiting (30 requests per minute) can be bypassed by technical users. For stronger enforcement, implement server-side rate limiting in your API proxy.
Site Collection Whitelist
This is a client-side governance feature, NOT a security control. For true access control:
- Use SharePoint page permissions
- Implement Azure AD group-based authorization
- Add server-side validation in your API proxy
- Use tenant-level IP restrictions
Data Security
- User Messages: Stored temporarily in browser memory only. Cleared when user closes the chat. Maximum 10 messages retained.
- API Communication: All communication uses HTTPS encryption.
- HTML Content: All AI responses are sanitized to prevent XSS attacks using DOMPurify.
Monitoring Recommendations
Setup Checklist
- Package deployed to App Catalog
- Solution made available to all sites
- Web part added to target page
- API key configured and datasets refreshed
- Dataset filtering configured (if needed)
- Default datasets set (if desired)
- Site collection whitelist configured (if needed)
- Page published and tested
- Test question sent and response received
- API usage monitoring set up
- API key documented in secure location
- Quarterly API key rotation scheduled
Additional Resources
- SharePoint Chat Widget Overview
- User Guide -- Share with end users
- Ask Sage Platform
- Ask Sage Support
- SharePoint Framework Documentation