Create and Manage
Create sub-organizations, edit them, and add members
Table of Contents
Open the Sub-Organizations console
The Sub-Organizations console lists the sub-organizations of one organization. An Admin clicks Sub-Organizations in the admin sidebar (see The Admin view). A Superadmin opens the console from the Organizations page:
- In the Super Admin sidebar, click Organizations.
- In the row of the organization, click Manage.

The Manage button opens the settings for one organization
- In the dialog that opens, click the Sub-Orgs tab.

The Sub-Orgs tab in the organization dialog
The console shows a table of sub-organizations. If the organization has no sub-organizations, the console shows the message “No sub-organizations yet.”
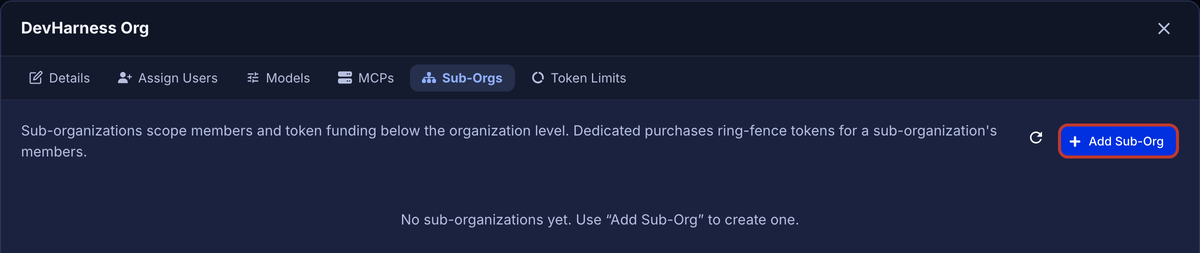
An empty Sub-Organizations console
Create a sub-organization
Each new sub-organization goes directly below the organization that you manage. You cannot select a different parent.
Create a sub-organization with Inherited funding
Use Inherited funding when the members share the organization pool and the sub-organization needs no ceiling. Each member still has a monthly token limit.
- In the Sub-Organizations console, click Add Sub-Org. The Add Sub-Organization dialog opens.
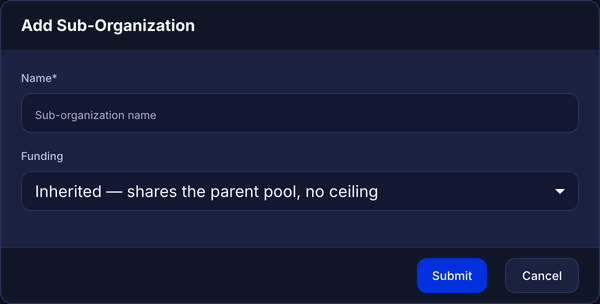
The Add Sub-Organization dialog
- In the Name field, type the name of the sub-organization.
- In the Funding list, select Inherited — shares the parent pool, no ceiling.
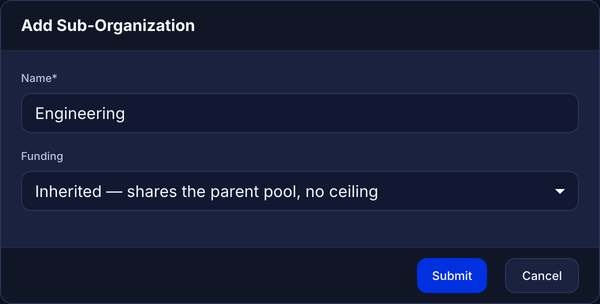
A completed form for an Inherited sub-organization
- Click Submit.
The dialog closes. The table shows the new sub-organization.
Create a sub-organization with Capped funding
Use Capped funding when the members share the organization pool, but administrators must not raise the monthly token limits above a fixed total. See What the ceiling does.
- In the Sub-Organizations console, click Add Sub-Org.
- In the Name field, type the name of the sub-organization.
- In the Funding list, select Capped — draws the parent pool, up to its own ceiling. The dialog shows two ceiling fields.
- In the Inference Token Ceiling field, type the inference ceiling.
- In the Embedding Token Ceiling field, type the embedding ceiling.
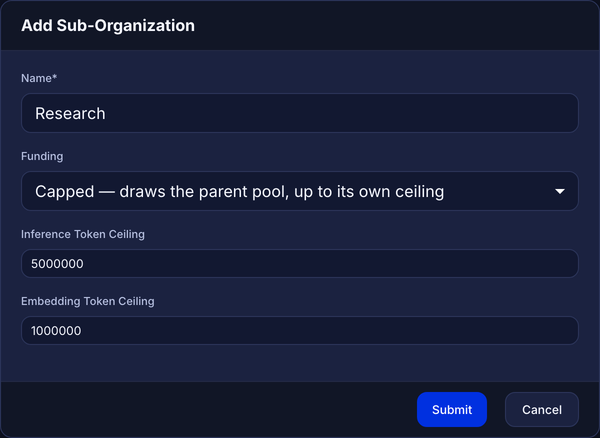
A completed form for a Capped sub-organization
- Click Submit.
If you leave a ceiling field empty, the sub-organization has no ceiling for that token type. A ceiling of 0 blocks every increase of a monthly token limit.
Compare the funding types
| Inherited | Capped | |
|---|---|---|
| Source of tokens | Parent organization pool | Parent organization pool |
| Ceiling on monthly token limits | None | The inference and embedding ceilings |
| Limit on prompts | The monthly token limit of the member and the organization pool | The monthly token limit of the member and the organization pool |
| Pool column in the console | Shared pool | Ceiling: number |
A third funding type, Dedicated pool, starts when an administrator records a purchase for the sub-organization. See Dedicated pools.
Name errors
The system rejects a name in these conditions:
| Condition | Result |
|---|---|
| The Name field is empty. | The dialog shows “Name is required.” |
| Another sub-organization in the organization has the same name. | The dialog shows “A record with this name already exists” and keeps the form open. |
| The name has more than 255 characters. | The field accepts no more than 255 characters. At 230 characters, the field shows a character counter. |
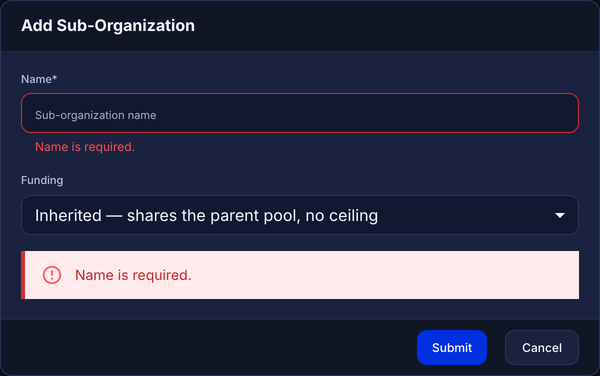
The error for an empty name
Read the console table
The table shows one row for each sub-organization.
| Column | Content |
|---|---|
| ID | The system identifier of the sub-organization. |
| Name | The name of the sub-organization. |
| Funding | The funding type: Inherited, Capped, or Dedicated pool. |
| Pool | A short summary of the funding. |
| Members | The number of members. |
| Created | The date of creation. |
| Actions | The buttons for Edit, Manage members, Manage dedicated purchases, and Delete. If the system cannot delete the sub-organization, a warning icon shows next to Delete. |
To see the full funding details for a sub-organization, click the arrow in its Pool cell. To close the details, click the arrow again.
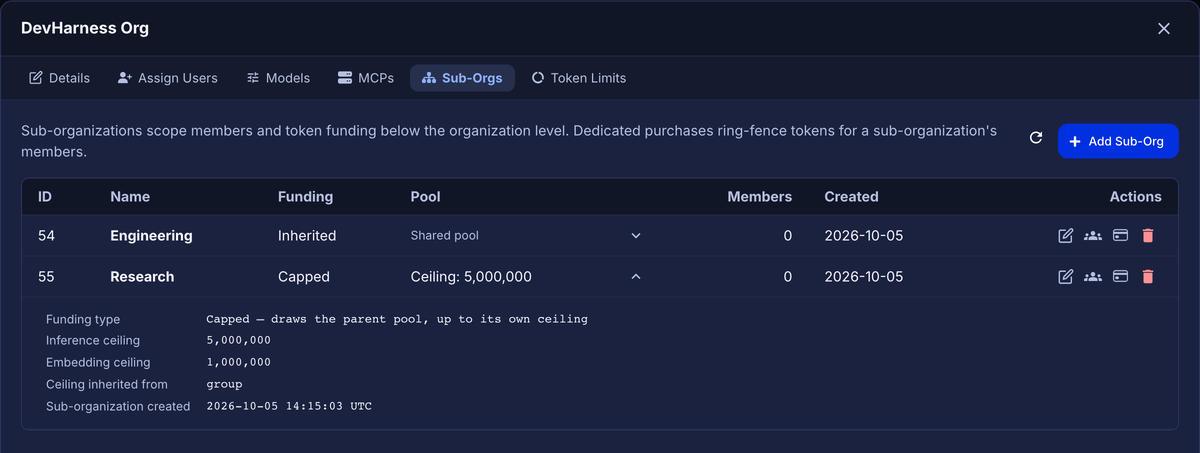
The funding details of a Capped sub-organization
Edit a sub-organization
Use the Edit Sub-Organization dialog to change the name, the funding type, or the ceilings of a sub-organization. A Sub-Org Admin does not see the Edit button.
- In the Sub-Organizations console, in the row of the sub-organization, click the Edit button (the pencil icon). The Edit Sub-Organization dialog opens with the current values.
- Change the values. The rules for a new sub-organization also apply here.
- Click Submit.
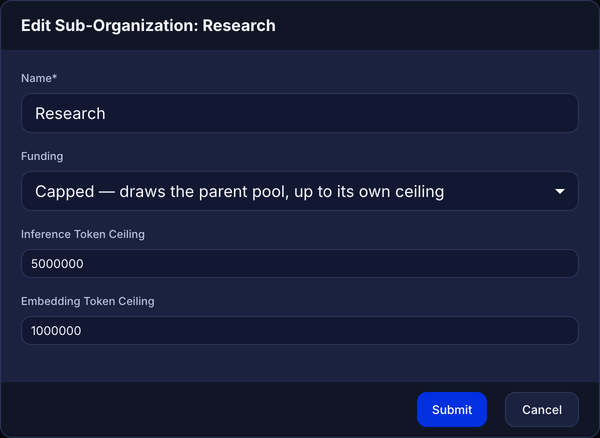
The Edit Sub-Organization dialog
The dialog closes, and the table shows the new values.
You can change the funding from Inherited to Capped, and from Capped to Inherited. When you change the funding to Inherited, the system removes the ceilings. For a sub-organization with a dedicated pool, see Dedicated pools.
Add members from the console
The Manage Members dialog shows the members of one sub-organization. You can add a maximum of 100 users at the same time.
- In the row of the sub-organization, click the Manage members button.
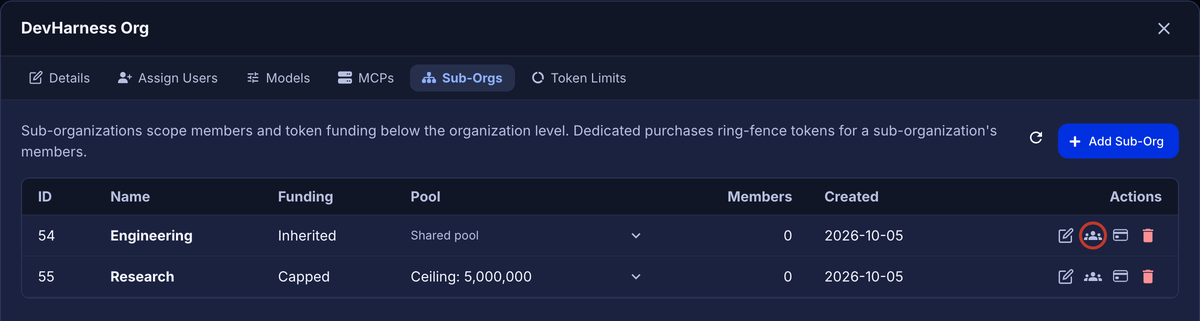
The Manage members button in the Actions column
The Manage Members dialog opens. The line under the title shows the parent organization.
- In the Add members area, type the email address of the user.
- Optional: to add more users, click Add another. Type the email address of the next user in the new field. Do this step again for each user.
- Click Add to Sub-Org.
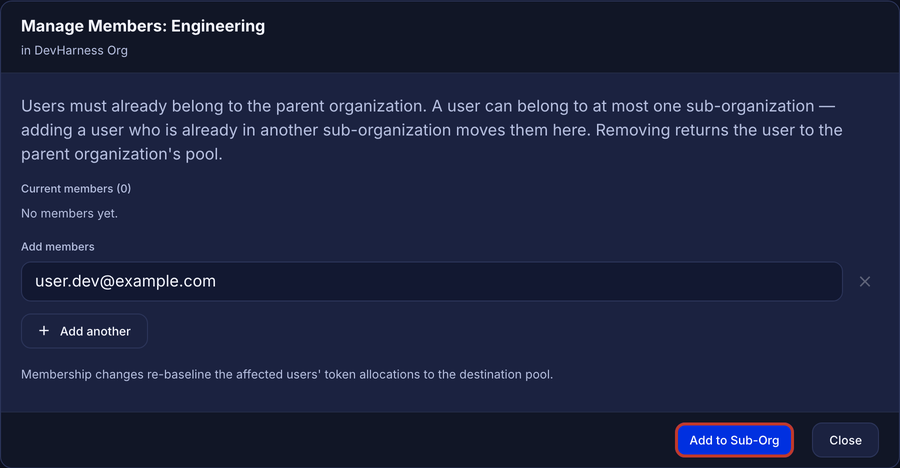
An email address in the Add members area
The dialog shows the result. The Current members list shows the user.
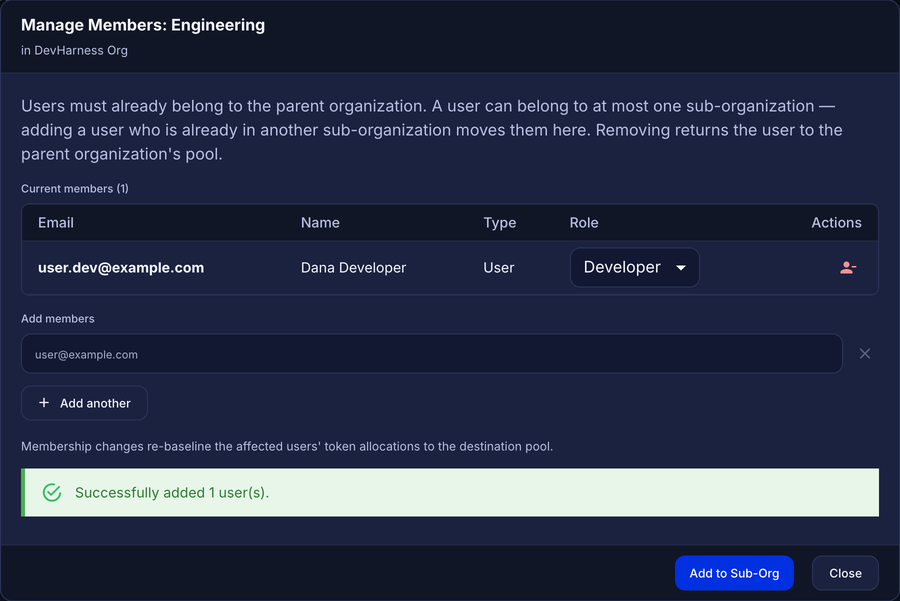
The result message and the updated member list
- Click Close.
Caution: before you add a user, make sure that the user is not in a different sub-organization. If the user is in a different sub-organization, the system moves the user without a confirmation. The previous sub-organization loses the member.
Results of an add operation
| Message | Meaning |
|---|---|
| Successfully added n user(s). | The system added all the users. |
| Added m of n user(s). k could not be added. | The system added some of the users. The dialog lists the failures. |
| Could not add n user(s). | The system added none of the users. |
| You cannot change your own sub-organization assignment. Another administrator must do it. | You typed your own email address. |
Assign a user from User Management
You can also set the sub-organization of a user from the User Management page. Use this procedure when you work on one user at a time.
Find the sub-organization of a user
The Sub-Org column shows the sub-organization of each user. The column is empty for a user at the organization level. The Admin Scope column shows “Organization-wide” for an Admin or a Superadmin.
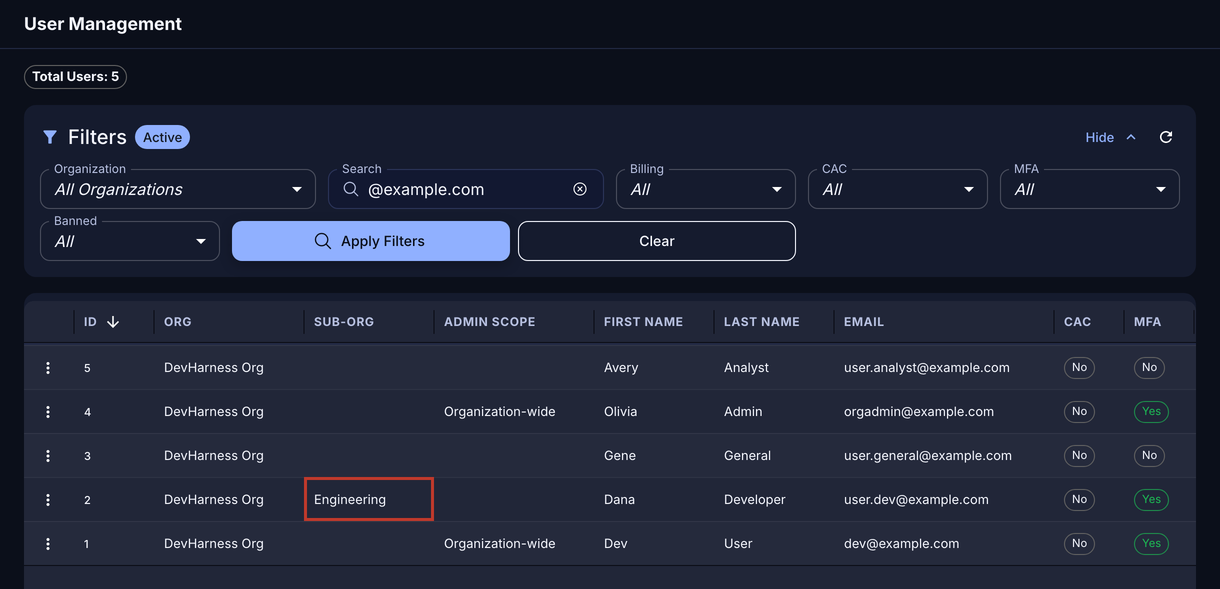
The Sub-Org column in User Management
Set the sub-organization of a user
- In the sidebar, click User Management.
- In the Search field, type the email address of the user.
- In the row of the user, click the actions button (three dots).
- Click Set Sub-Org.
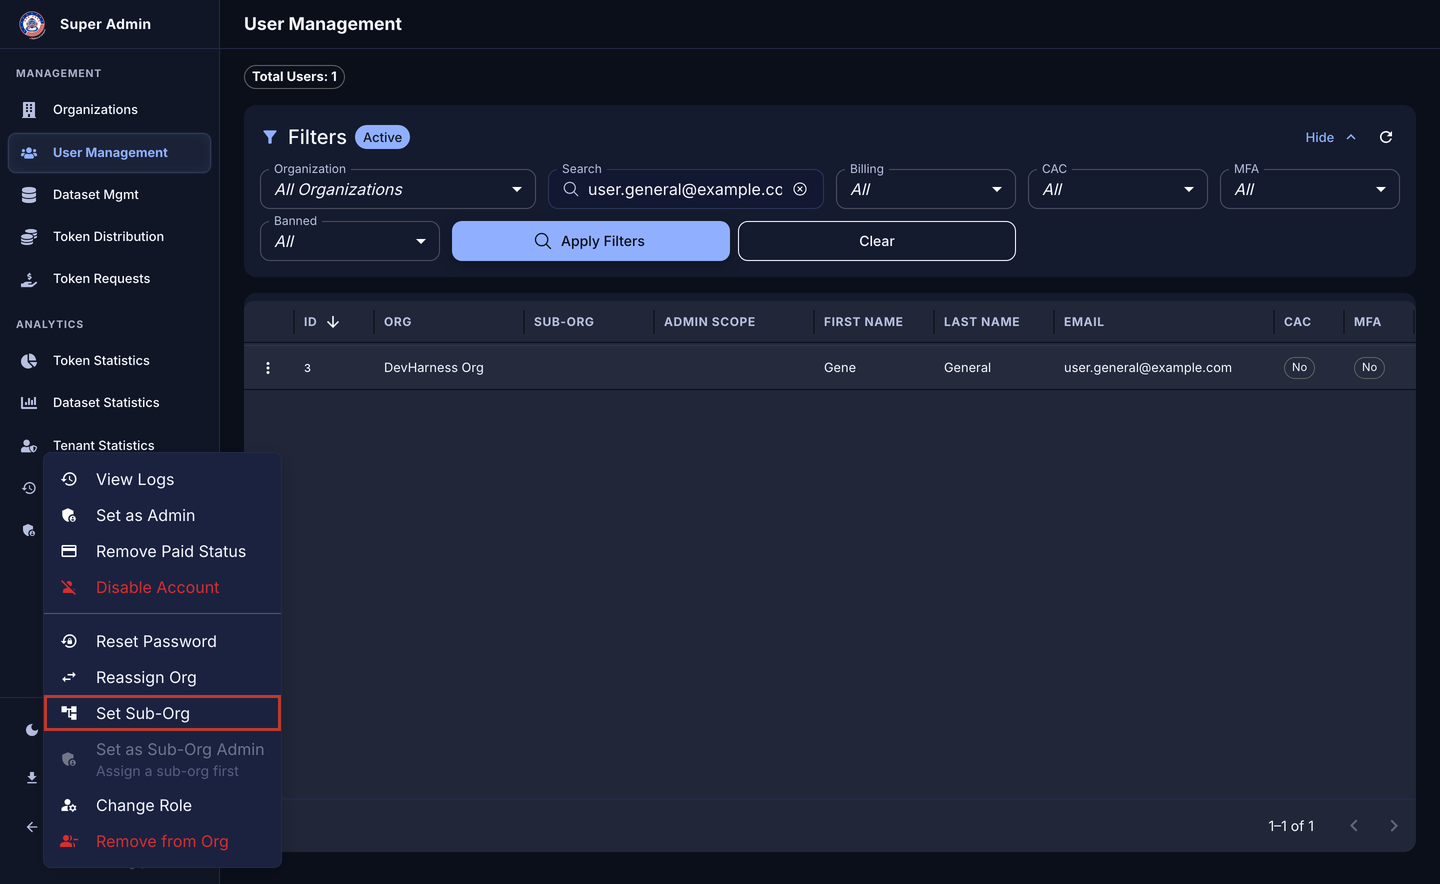
The Set Sub-Org item in the actions menu
The Set Sub-Organization dialog opens.
- In the Sub-Organization list, select the sub-organization.
- Click Assign.
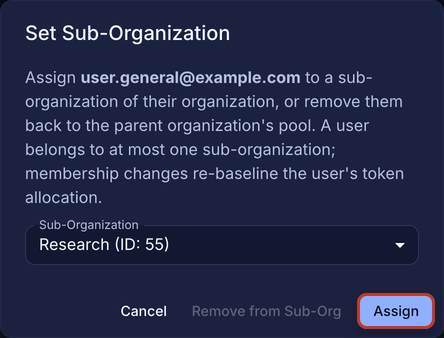
The Set Sub-Organization dialog
The system shows the message “Sub-organization assignment updated.” The Sub-Org column shows the new value.
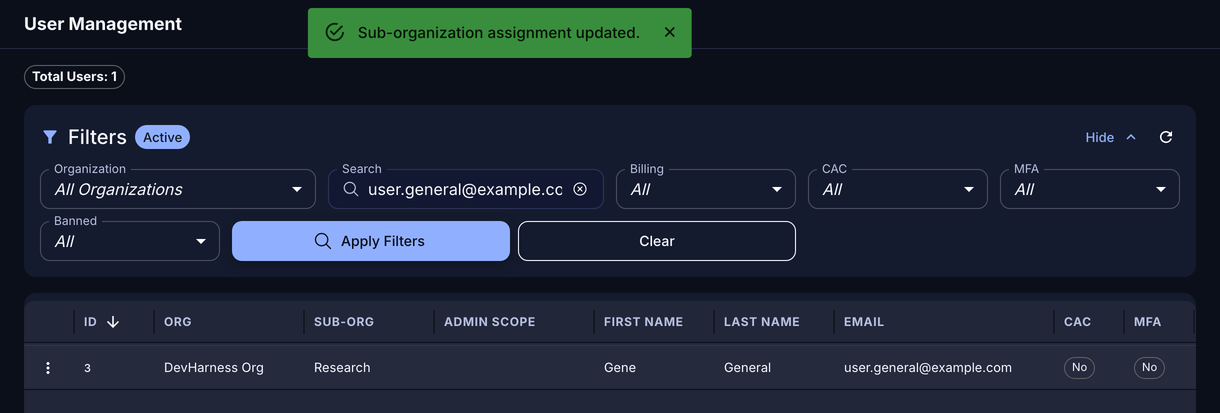
The confirmation message and the updated Sub-Org column
Move a user back to the organization level
- Open the Set Sub-Organization dialog for the user. Use steps 1 to 4 of the previous procedure.
- Click Remove from Sub-Org.
The system shows the message “Member removed from sub-organization.” The account of the user does not change. Only the membership changes.
If the user is a Sub-Org Admin, the buttons show Revoke Role & Assign and Revoke Role & Remove. These buttons also remove the Sub-Org Admin account type.
Show the users of one sub-organization
The Sub-Org filter shows only the users of one sub-organization. The page shows this filter only when the organization has one or more sub-organizations.
- If you are a Superadmin, on the User Management page, in the Organization list, select the organization. An Admin does not see this list.
- In the Sub-Org list, select the sub-organization.
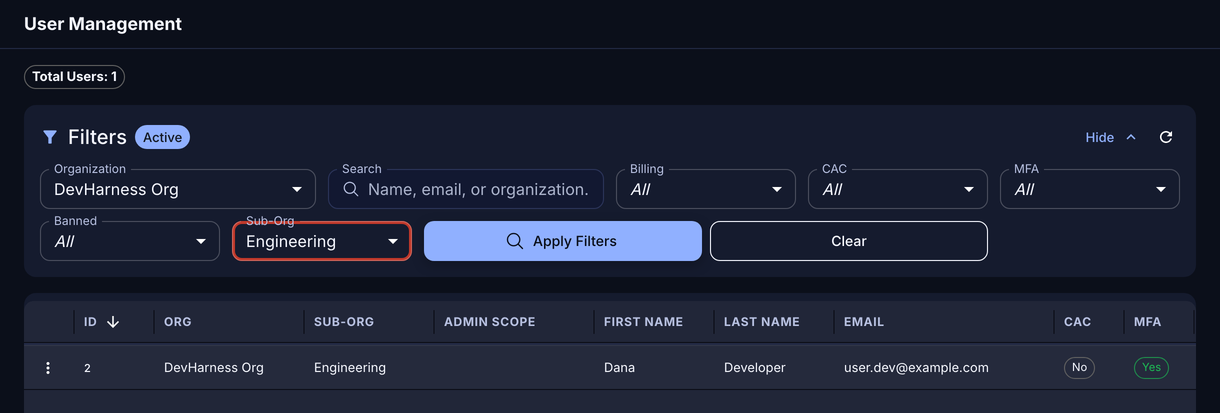
The User Management page filtered to one sub-organization
To show all users again, select All in the Sub-Org list.