Organizations
Create and manage organizations, assign users, restrict models and MCPs, set up sub-organizations, and record token purchases
Table of Contents
The Organizations page is available to users with the SuperAdmin type (see the Type column in User Management). It is the tenant-wide view of every organization on the instance, and it is where an organization’s contact details, members, model access, hosted MCPs, sub-organizations, token defaults, and purchases are managed. Organization admins do not see this page; their view is described on Enterprise Accounts.
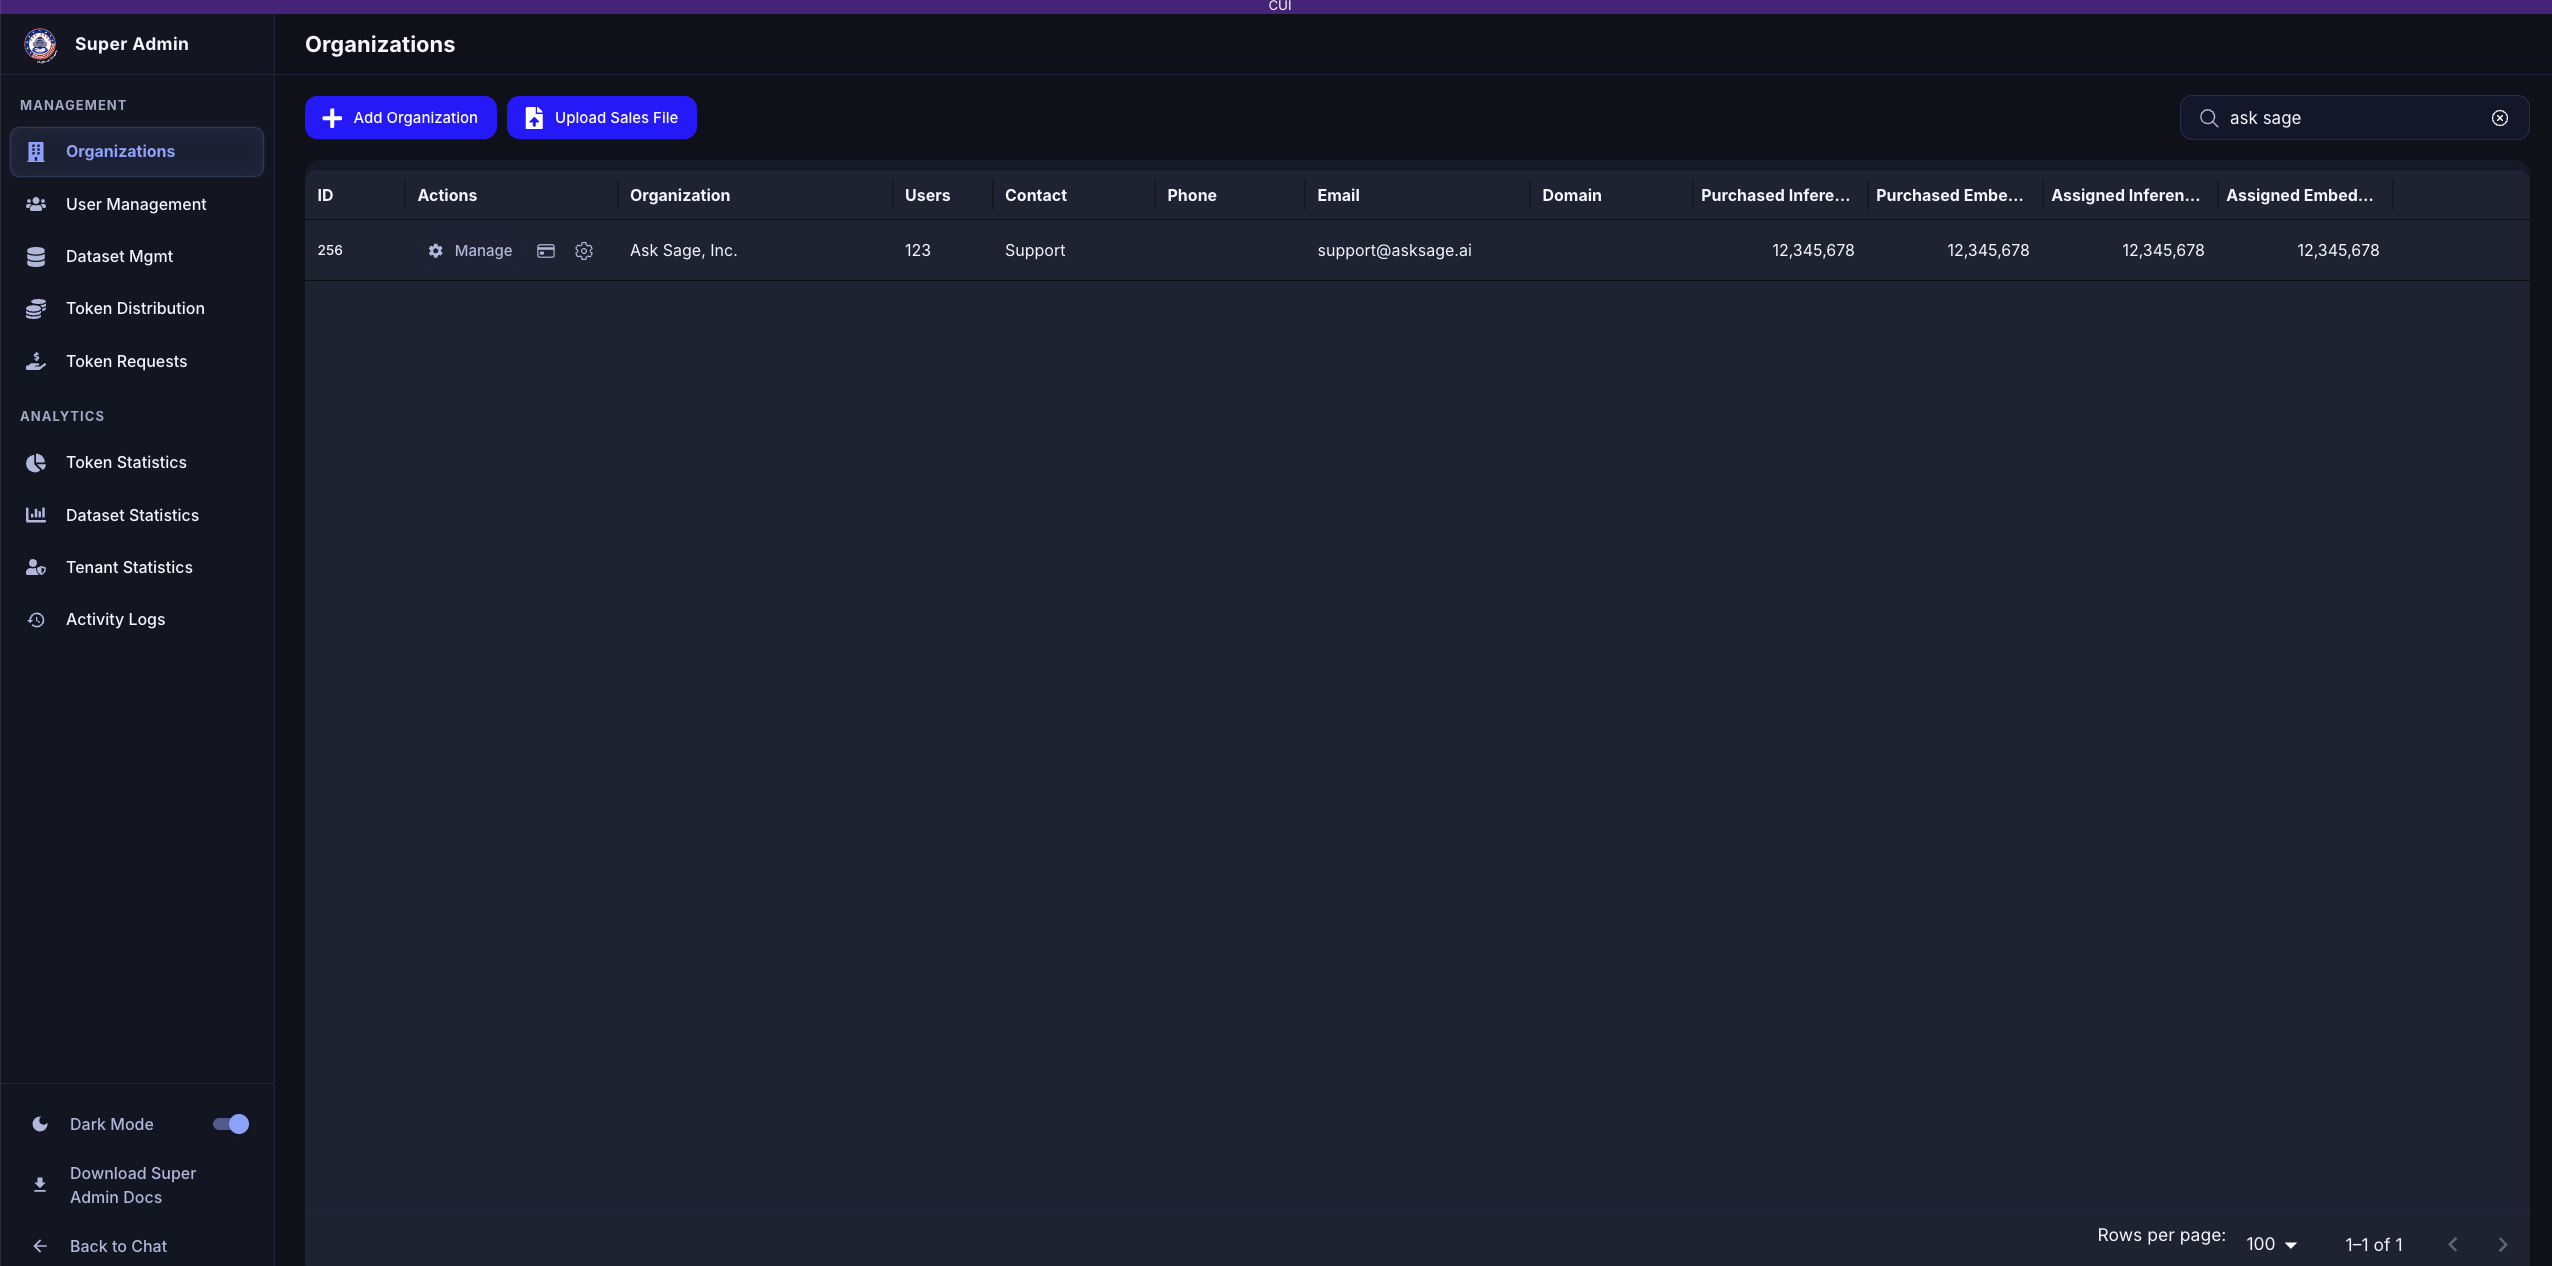
Super Admin panel — Organizations
Super Admin Panel Layout
The Super Admin sidebar extends the standard Admin Panel with tenant-wide pages:
Management
- Organizations — this page
- User Management — all users on the tenant (see User Management)
- Dataset Mgmt — datasets across the tenant
- Token Distribution — allocation policies, with an Organization selector (see Token Distribution)
- Token Requests — pending requests (see Token Requests)
Analytics
- Token Statistics, Dataset Statistics, Tenant Statistics, and Activity Logs
The bottom of the sidebar has a Dark Mode toggle, a Download Super Admin Docs link, and Back to Chat.
Organizations Table
Use the search box in the top-right to filter organizations by name. Each row shows:
- ID — the organization's numeric identifier
- Actions — Manage opens the organization dialog described below; the card icon opens Organization Purchases; the gear icon opens organization settings, including the MCP OAuth configuration
- Organization, Users, Contact, Phone, Email, Domain — the organization's details and member count
- Purchased Inference / Purchased Embedding — total tokens purchased
- Assigned Inference / Assigned Embedding — tokens currently assigned to the organization's users
Two buttons sit above the table:
- Add Organization — create a new organization
- Upload Sales File — bulk-load organizations and purchases from a spreadsheet
Upload Sales File
Upload Sales File opens the Upload Sales Data dialog. Choose an Excel file that follows the Ask Sage template and click Upload. The template is required; files in other layouts are not accepted.
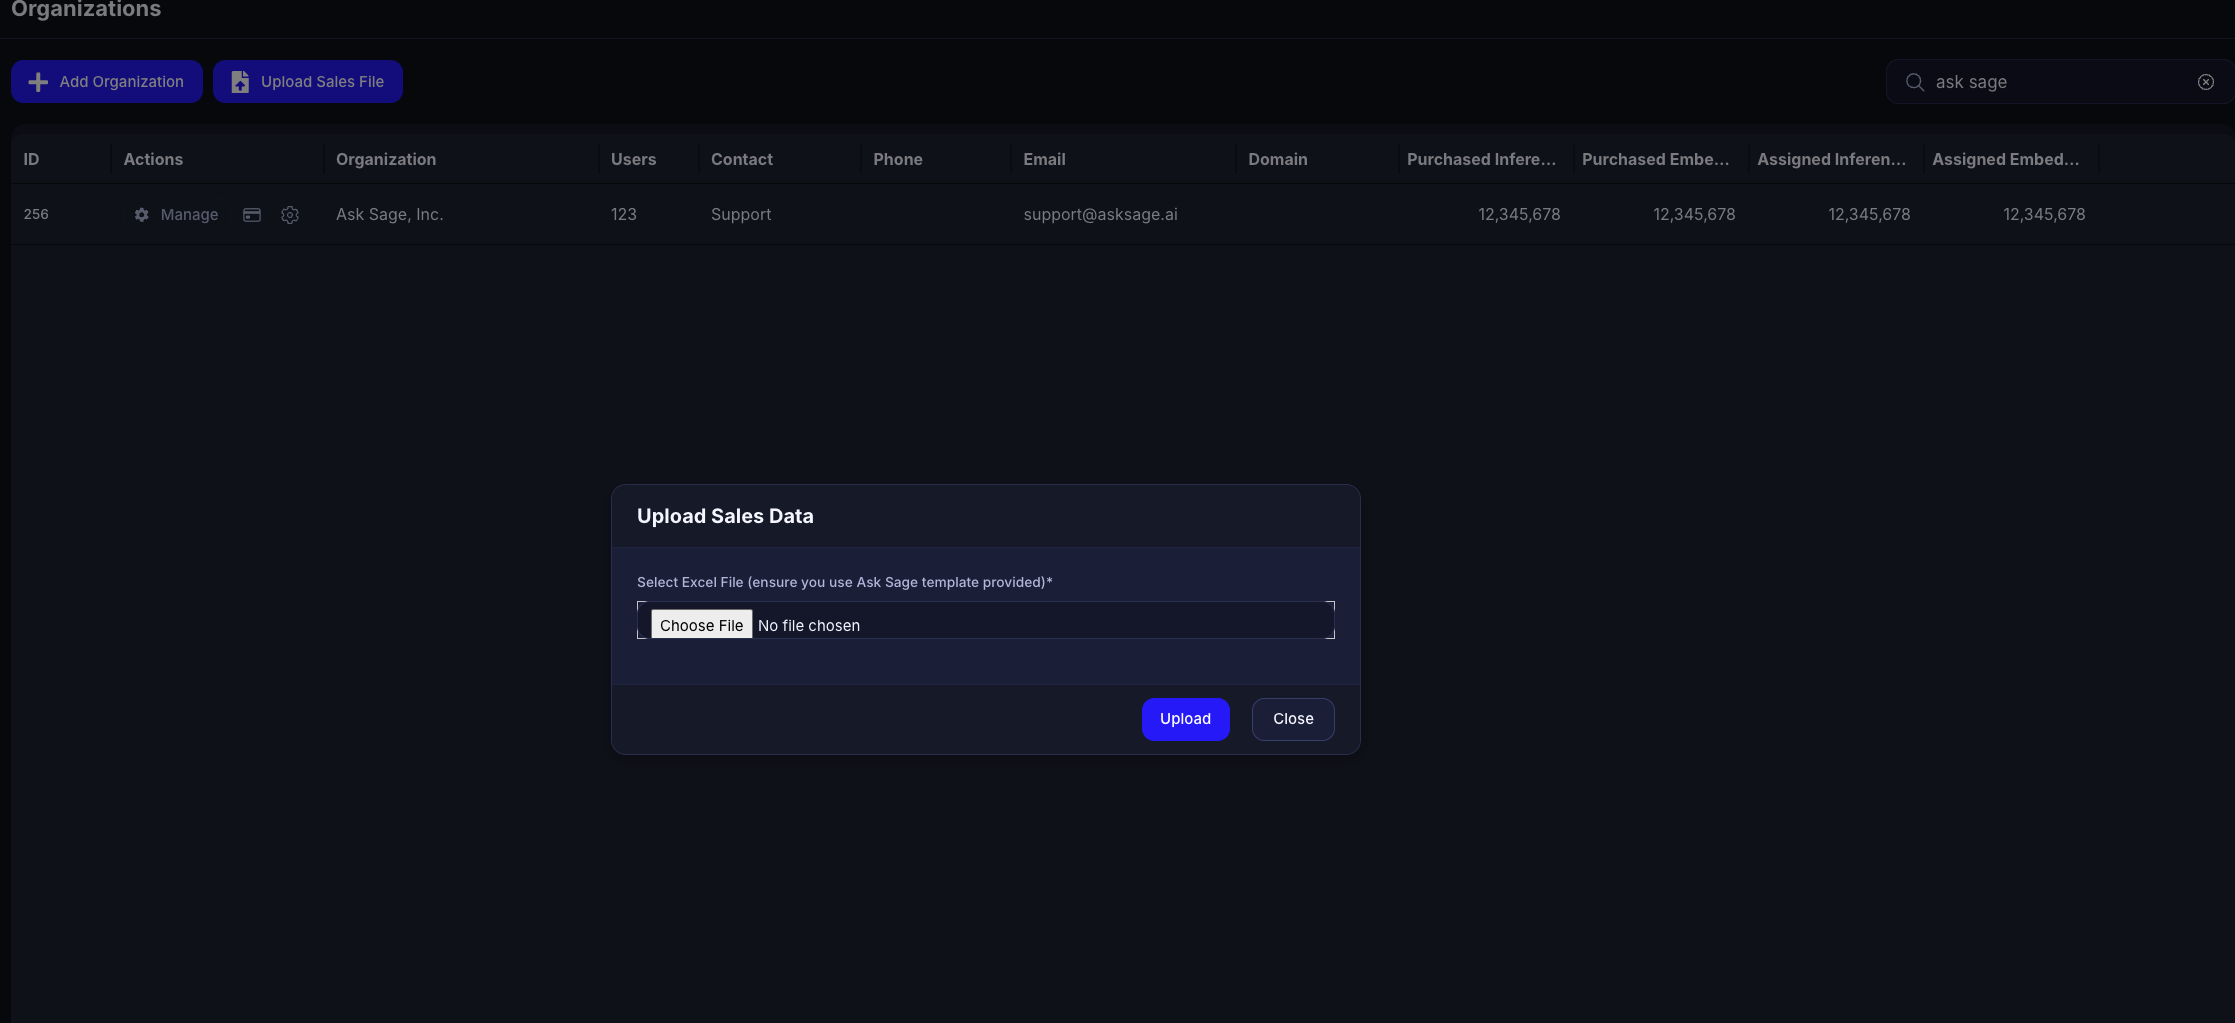
Upload Sales Data
Managing an Organization
Clicking Manage on a row opens a dialog titled with the organization’s name. Its tabs are Details, Assign Users, Models, MCPs, Sub-Orgs, and Token Limits.
Details Tab
- Name (required)
- Point Contact (required) — the organization's point of contact, shown to members as their Organization Contact
- Country (required)
- Phone
- Email (required)
- Domain Name — when set, users who register with an email at this domain are automatically assigned to the organization
Click Save Changes to apply.
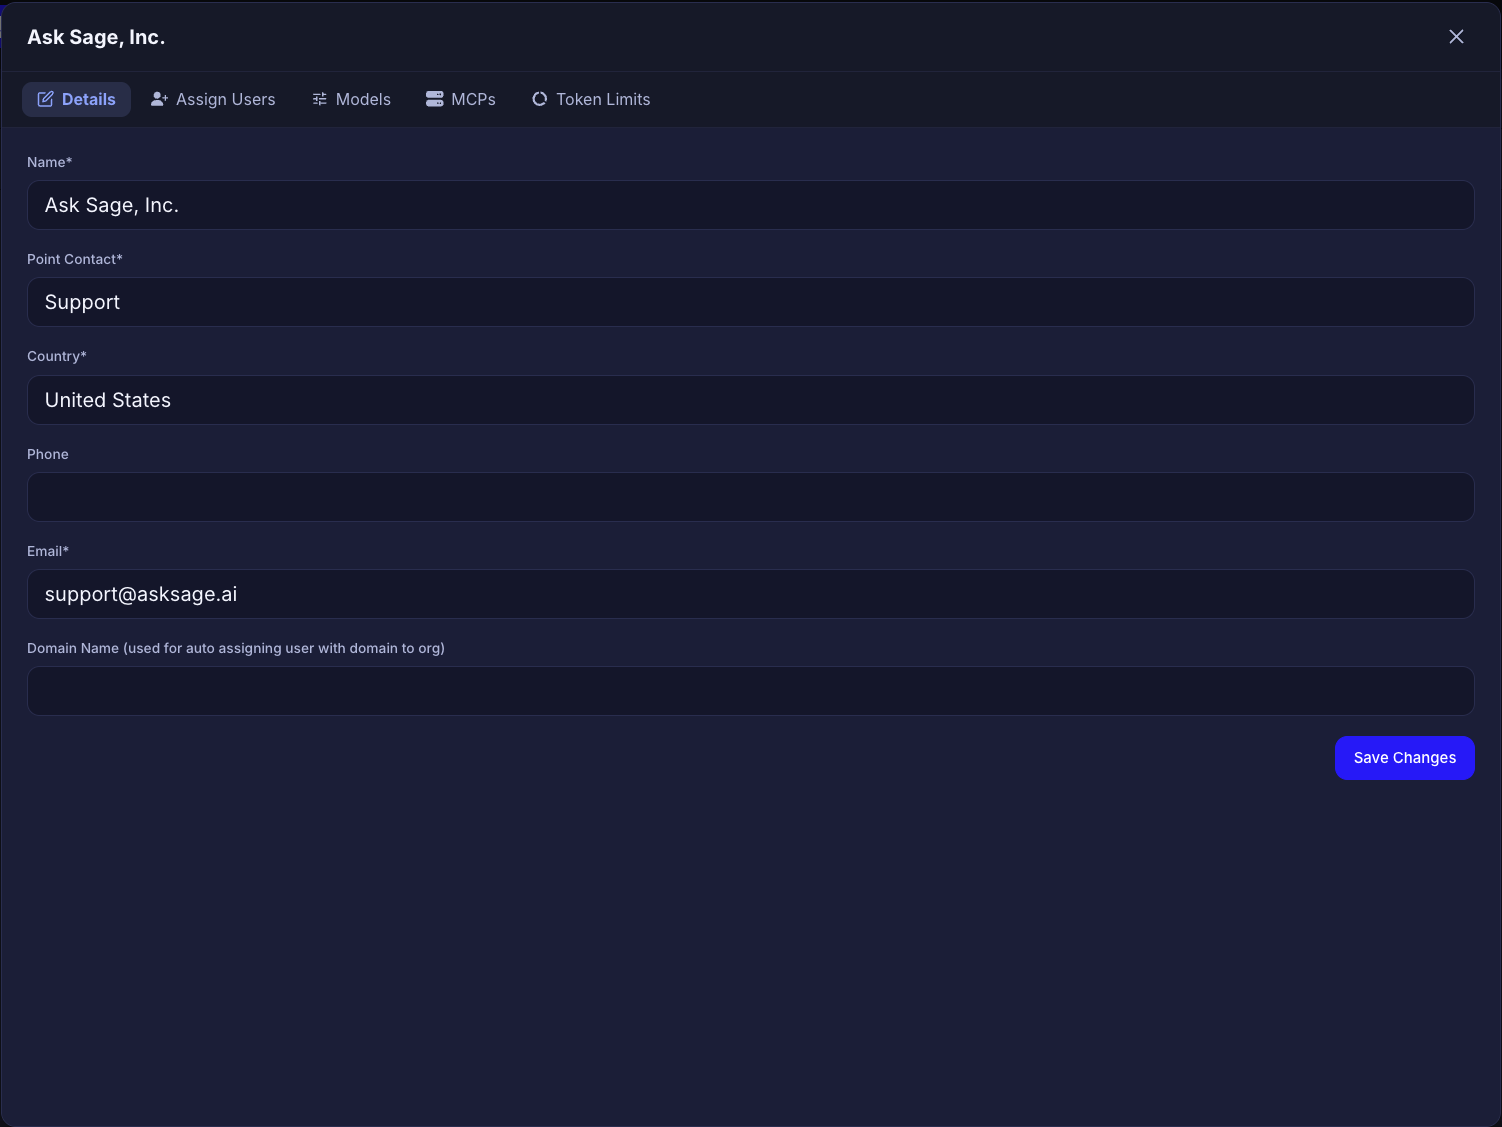
Details tab
Assign Users Tab
Paste or type the email addresses of the users to add, one per line, and click Assign Users. Users must already have registered an Ask Sage account.
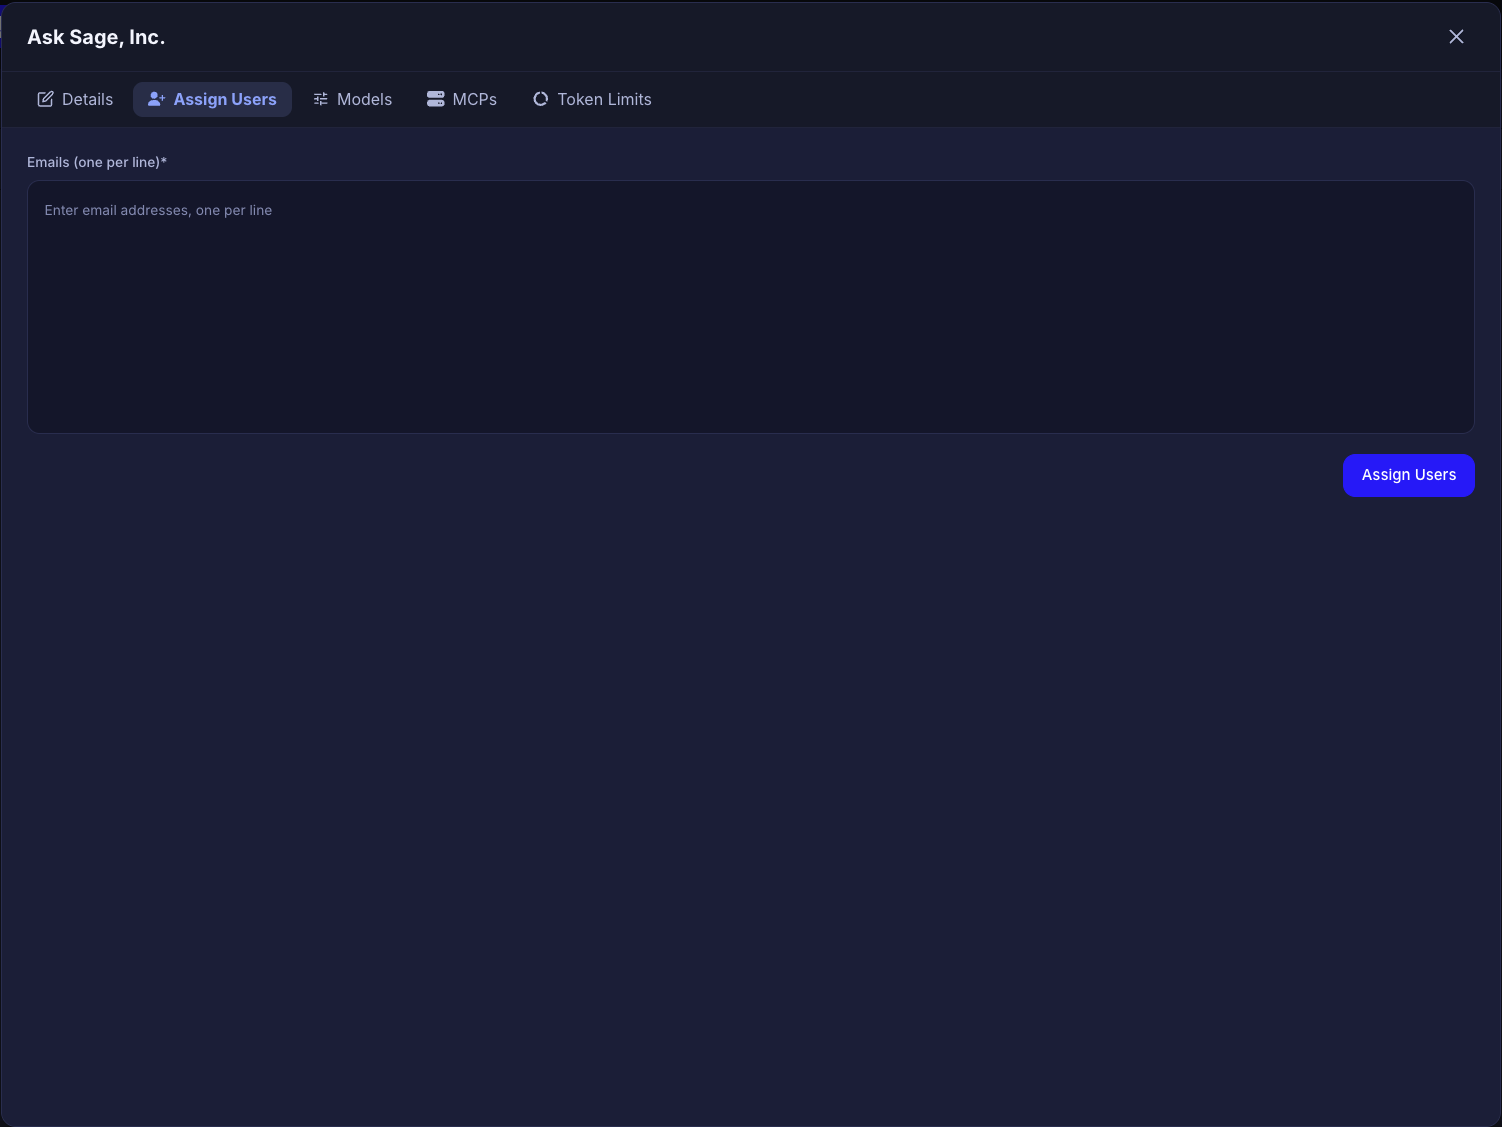
Assign Users tab
Models Tab
Select which models the organization's users can access. If none are selected, users see all default models. Filter the list with the capability chips (Audio, Image Generation, MCP, Reasoning, Video, Video Generation, Vision) or the search box, and use All / None to toggle every model at once. A status line above the list reports the current state, for example "All models selected — no restriction applied."
Each row shows the display name, the model ID used by the API, and colored dots for its capabilities.
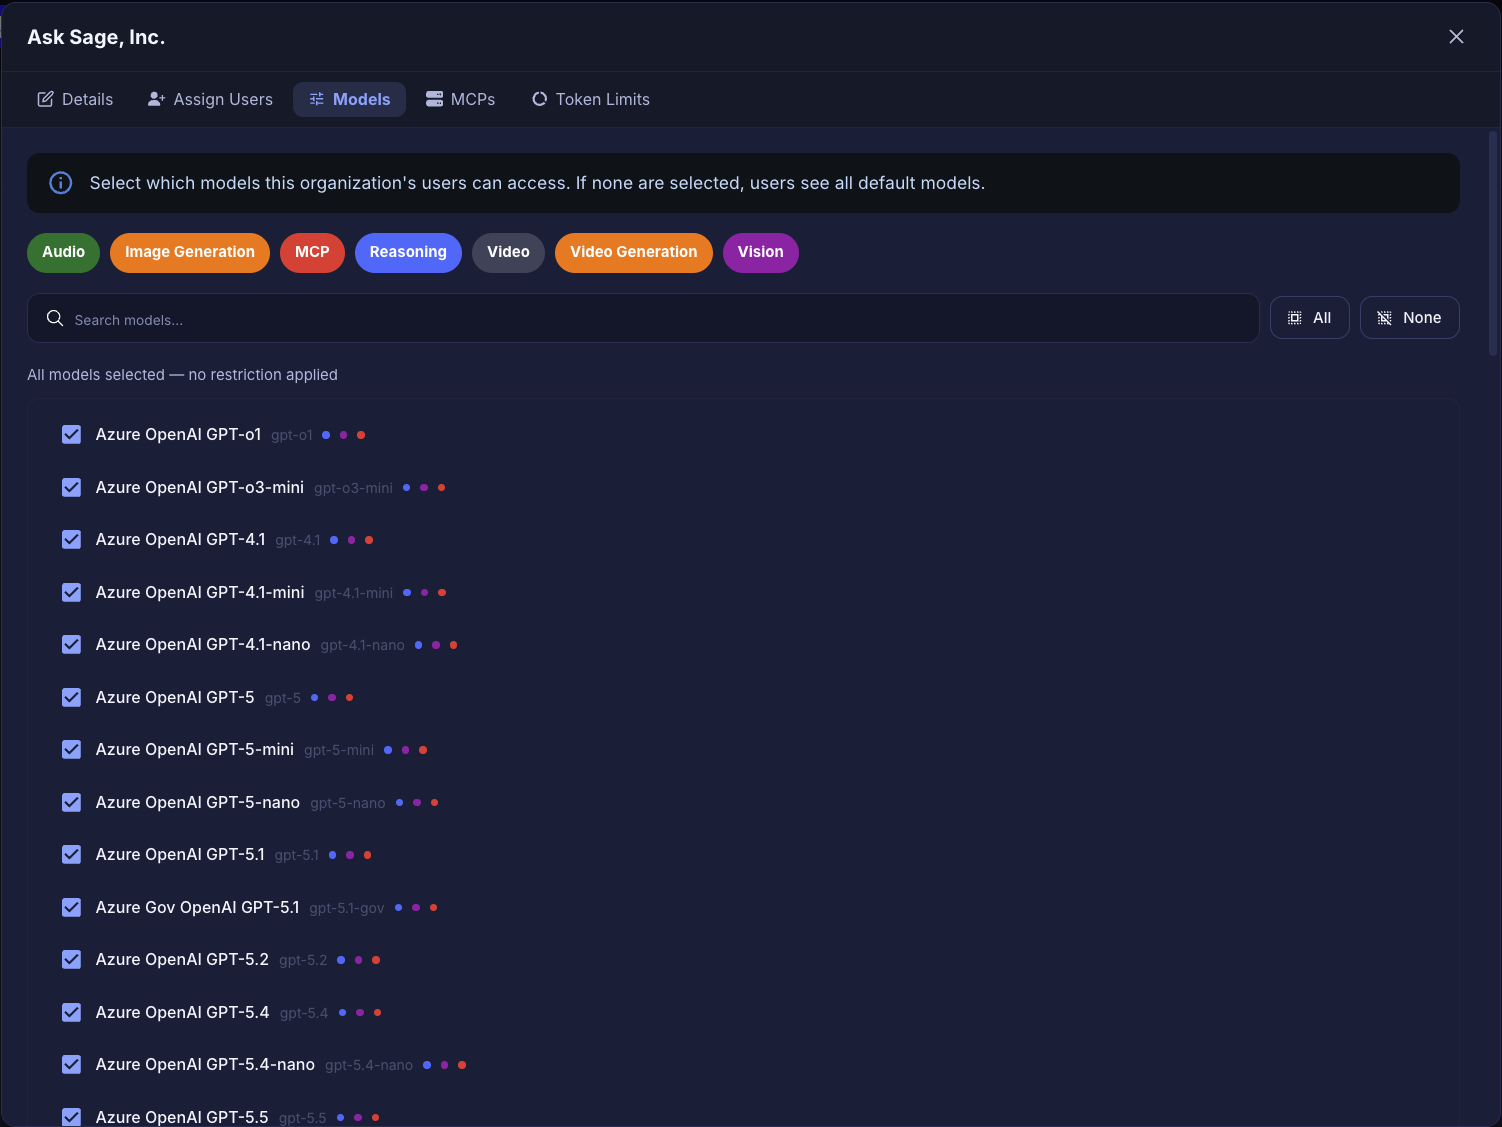
Models tab
MCPs Tab
The MCPs tab lists the tenant's hosted MCP servers (for example GitHub, Microsoft 365, Calculator, and Box) with an Active or Inactive badge. Active status reflects whether each MCP server is reachable and properly configured. Servers such as Microsoft 365 require an OAuth connector before they become active; see MCP OAuth Configuration below.
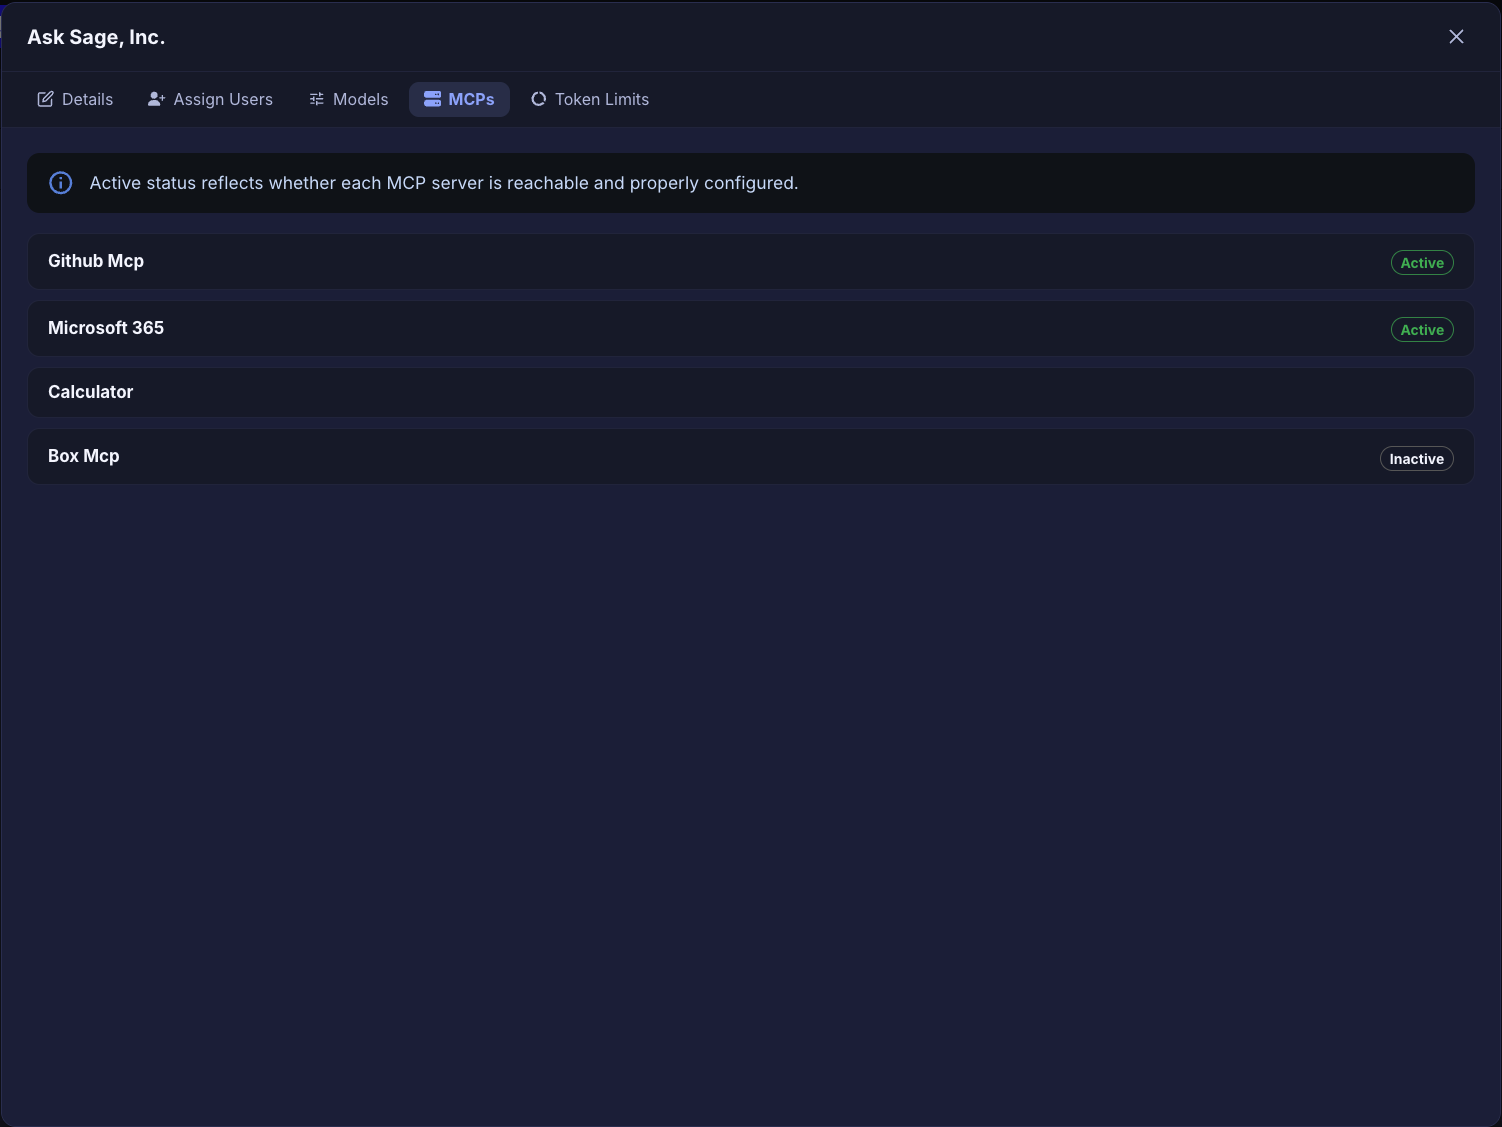
MCPs tab
Token Limits Tab
Max Inference Tokens and Max Embedding Tokens set the starting allocation for users newly enrolled into the organization, bounded by the organization's remaining pool. Each user's limits stay editable afterwards from Token Management. Leave a field blank to use the system default, then click Save Token Limits.
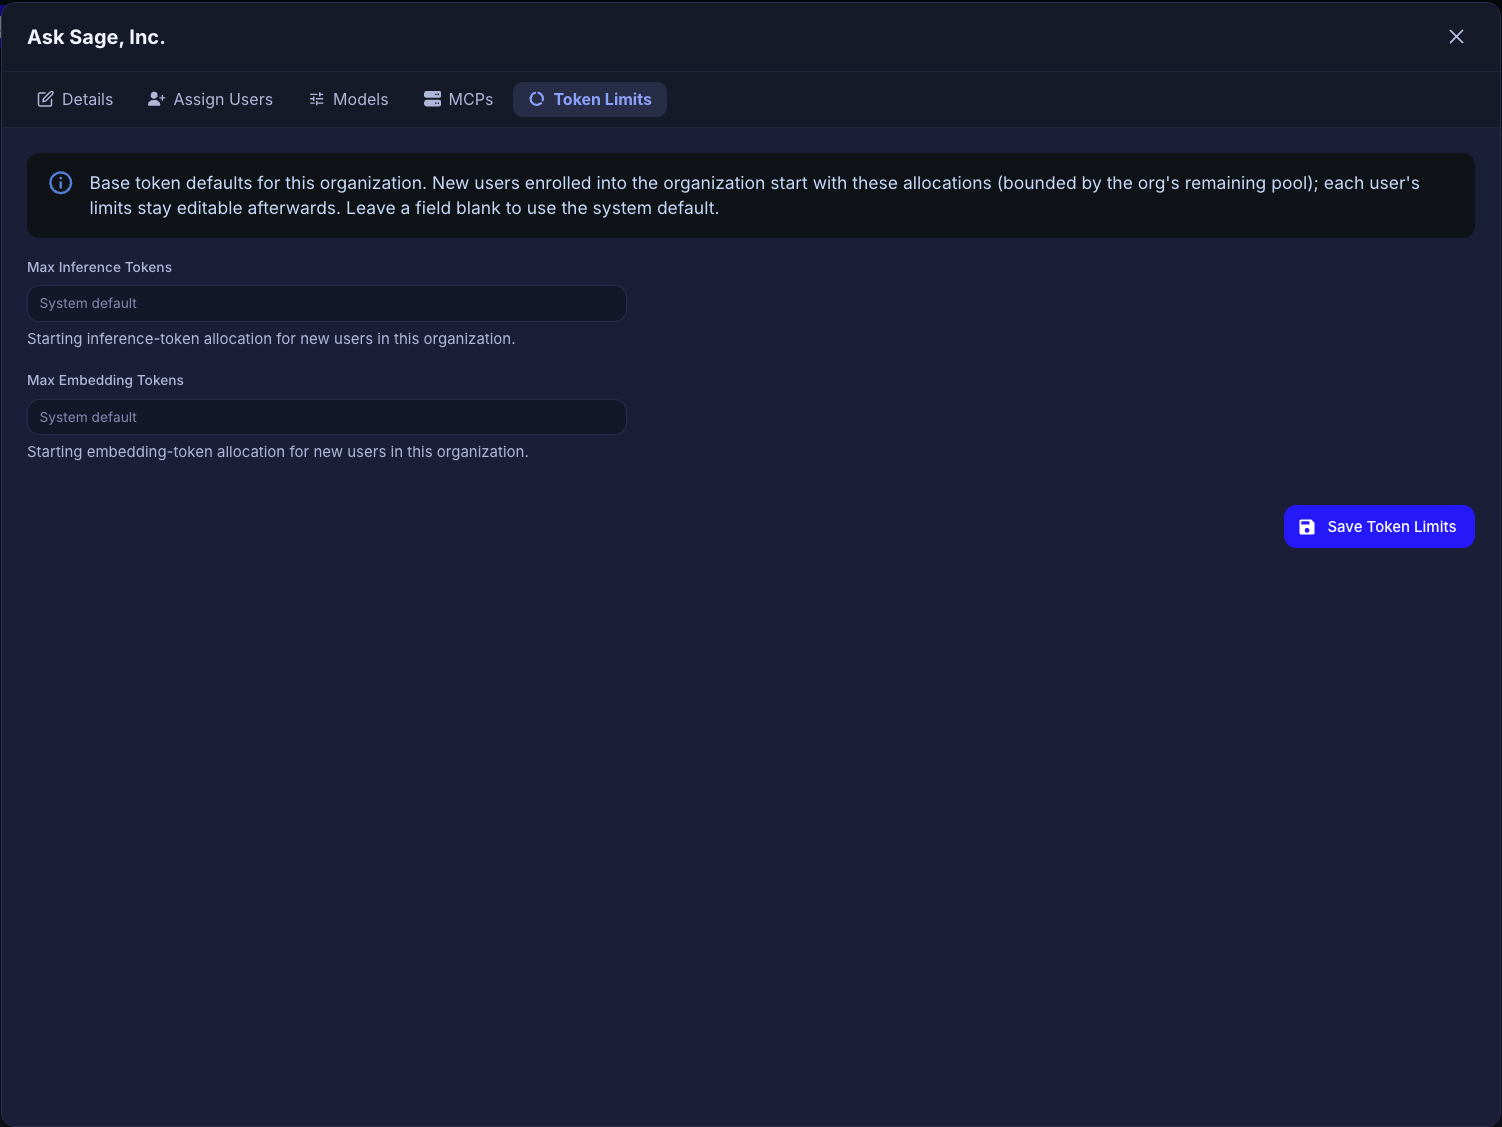
Token Limits tab
Sub-Organizations
The Sub-Orgs tab opens the Sub-Organizations console for the organization. A sub-organization is a group of users inside the organization, with its own member list and its own funding type:
- Inherited: members use the organization pool. The sub-organization has no ceiling.
- Capped: members use the organization pool. A ceiling limits the total of the monthly token limits that administrators can give.
- Dedicated pool: the sub-organization has its own purchased tokens. Only its members can use them.
For the procedures, see Sub-Organizations.
Organization Purchases
The card icon in the Organizations table opens Organization Purchases. The Purchase Summary shows the Organization ID, total purchases (with how many are active), Active Inference and Active Embedding tokens, and all-time totals. Click Add New Purchase to record a purchase, or Back to Organizations to return.
Purchase History lists each purchase with its ID, Date Purchase, Email Payer, PO Number, Sub-Org (blank for organization-level purchases), Dedicated label, Payer Comment, Total Inference Tokens, Embedding Tokens, Expiration, and an edit action.
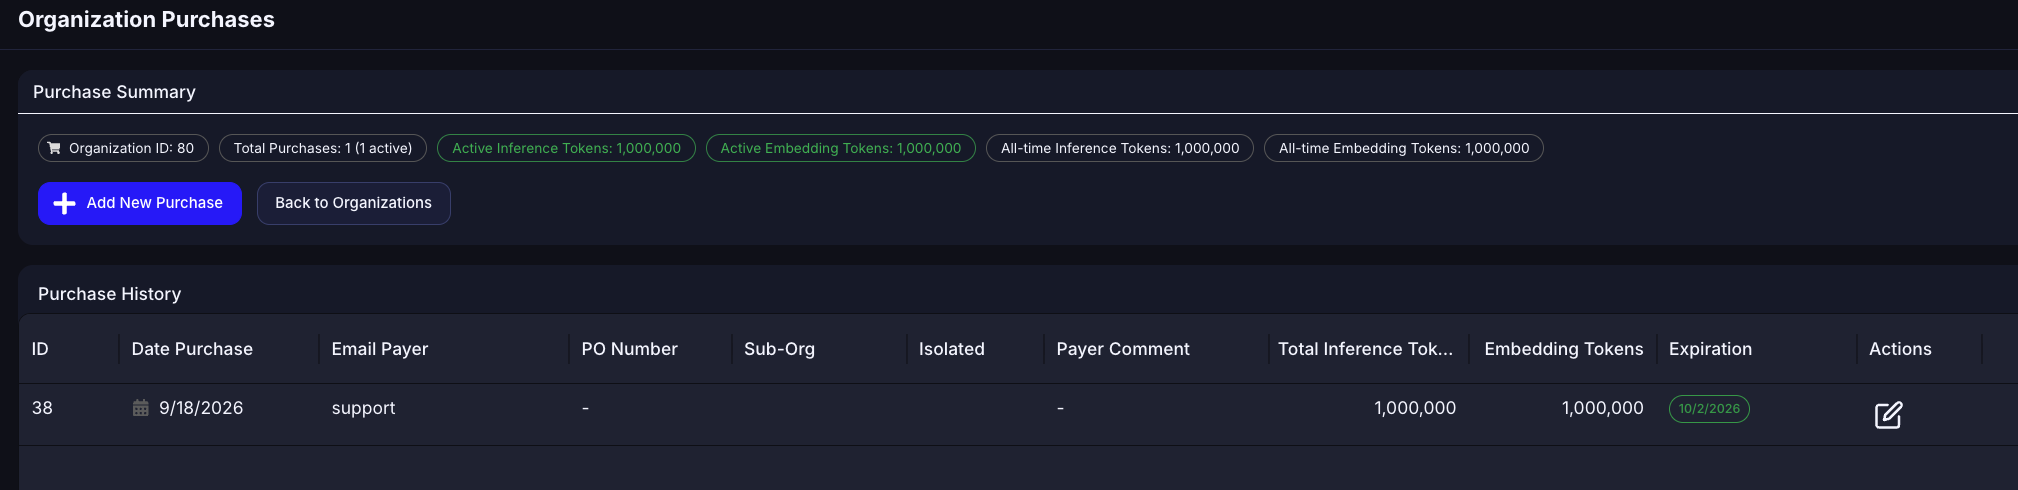
Organization Purchases
MCP OAuth Configuration
Hosted MCPs that sign users in through an identity provider, such as Microsoft 365, need an OAuth connector configured for the organization. The Configure OAuth dialog is opened from the organization's row in the Organizations table and shows the organization name at the top.
- OAuth Provider — the identity provider, for example Microsoft
- Active / Enabled toggle — turns the configuration on or off without removing it
- Application (Client) ID — from Azure Portal → App registrations → your app → Overview
- Directory (Tenant) ID — your Azure AD tenant ID (UUID format)
- Redirect URI — must match exactly what is configured in Azure AD; HTTPS is required
- Authentication Method — Client Secret or Certificate. When a secret is already stored, leave the field blank to keep it or enter a new value to rotate it
- OAuth Endpoints — the provider's authorization and token endpoints
Click Update Configuration to save, or Remove Configuration to delete the connector.
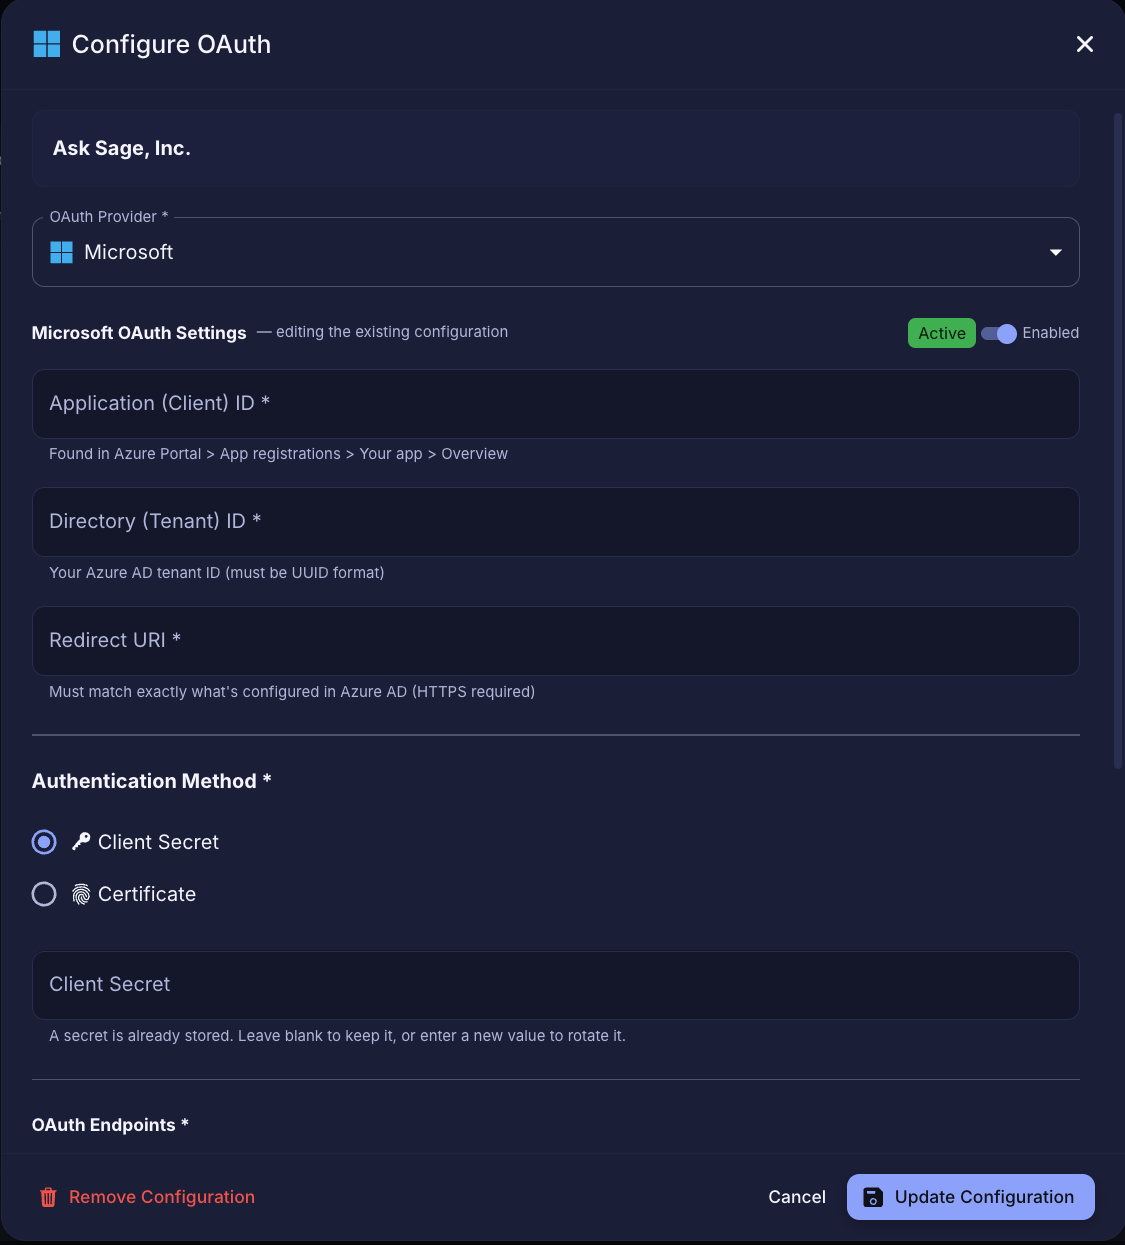
Configure OAuth — Microsoft provider
Related Pages
- User Management — user types, paid status, and per-user actions
- Token Distribution — shared pool, presets, and per-user caps
- Token Management — editing individual user limits
- Model Context Protocol — hosted MCPs and how users connect them